
I stood in a tech office in Austin three years ago. The air felt dead. Gray cubicles stretched forever. The CEO wanted a change. He asked for an Office Moss Wall that would stop people from quitting. We spent ten thousand dollars on a massive Biophilic Wall that mixed deep green moss with jagged slate. Within a week, the vibe changed. People stopped staring at screens and started touching the moss. That project taught me that nature isn’t a luxury. It is a tool for sanity.
Most people fail at this. They buy cheap moss from a craft store and wonder why it looks like a middle school science project. I have spent years testing glues, lights, and stone types. I have seen walls thrive and I have seen them turn into brown, dusty messes. This guide is my brain dump of everything I know about creating a Live Moss Wall and a Plant Feature Wall that lasts.
The Quick Version
You want a home or office that feels alive. You need a mix of soft Moss Walls and hard stone. I will show you how to pick the right moss for your light. We will look at how to mount heavy stone without tearing down your drywall. You will see 21 specific secrets to master Moss Wall Art Living Room designs. I will cover costs from $50 to $5000. You will get a list of the 10 tools I never go without. By the end, you will know exactly how to build a Living Moss Wall that breathes life into your space.
1. Mixing Preserved and Living Elements
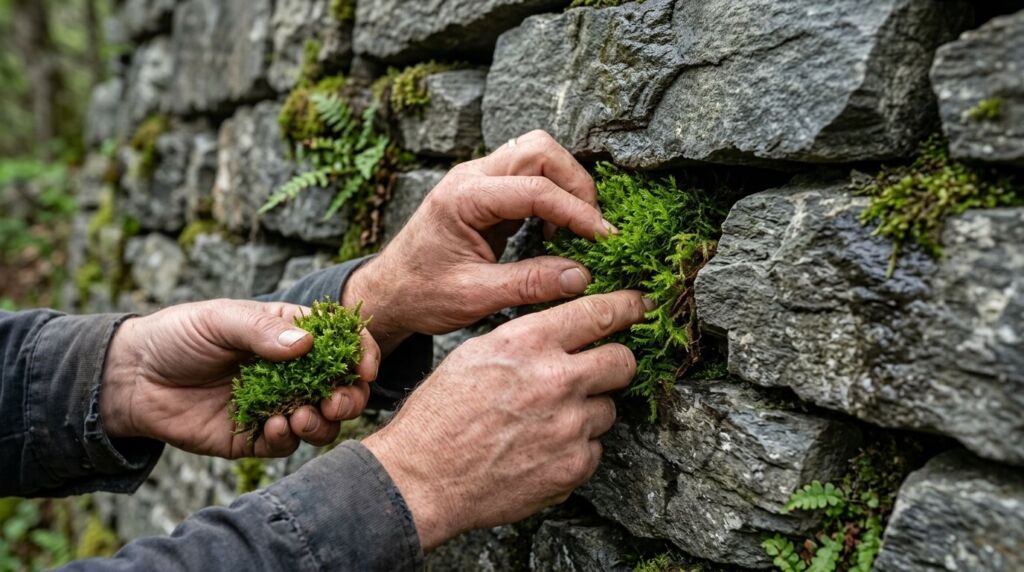
Most people think you must choose one or the other. You do not. I often mix preserved reindeer moss with a Living Moss Wall section. This gives you the best of both worlds. The preserved moss stays bright green forever. The live moss changes with the room humidity. I did this in a Seattle yoga studio. We used preserved moss for the background. We tucked live sheet moss into the stone cracks. The result was a texture that felt deep and real. It looked like a forest floor.
2. Slate Stone Backing for Weight
Stone adds the “wow” factor to Plants On Wall setups. But stone is heavy. Do not glue real heavy rocks to your wall. I use slate veneer or thin stone flats. In a Denver basement, I used four inch slate pieces. We screwed a plywood backing to the studs first. Then we glued the stone to the plywood. This keeps your house from falling apart. It also gives the moss a natural surface to grab. Slate stays cool and holds moisture well.

Fensong 20-Piece Artificial Moss Rocks – Realistic Green Decor for Crafts & Gardens
Add a touch of maintenance-free greenery to your space with these realistic artificial moss rocks. Featuring two distinct sizes, these lightweight foam stones are perfect for fairy gardens, terrariums, and floral arrangements. Durable and fade-resistant, they offer an effortless natural aesthetic for any indoor or outdoor creative project.
- ✓ Realistic Maintenance-Free Aesthetic
- ✓ Versatile Multi-Size Assortment
- ✓ Durable Weather-Resistant Construction
- ✓ Safe and Spore-Free Materials
- ✓ Ideal for DIY Crafting and Centerpieces
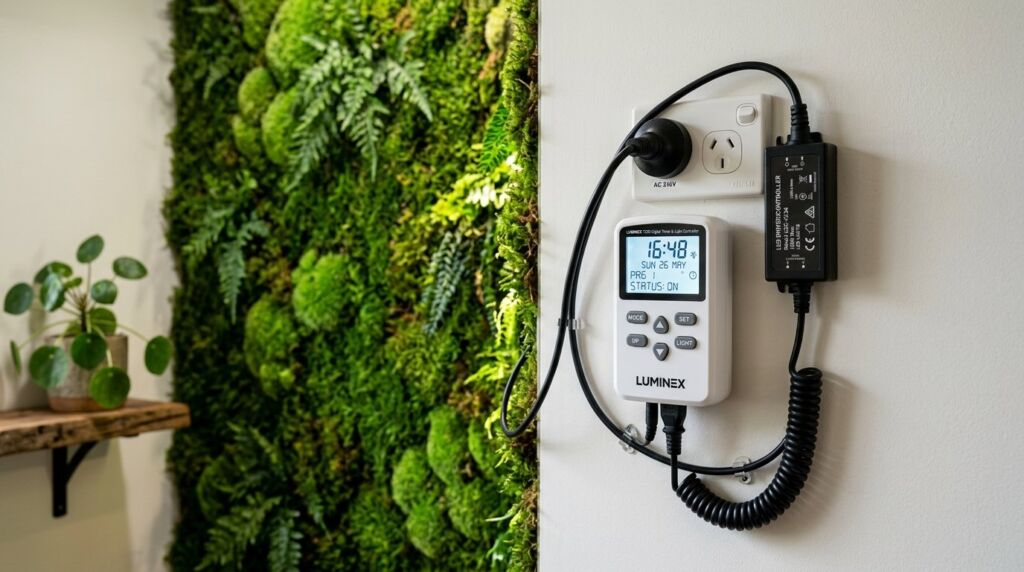
3. The Mist Schedule for Humidity

A Live Moss Wall is a thirsty beast. If you live in a dry place like Phoenix, your moss will die in days. I use a smart mister system. I set it to spray for ten seconds every four hours. I learned this the hard way in a Dallas office. We forgot to mist for a weekend. The moss turned into crispy cornflakes. Now I use Govee hygrometers to track the air. When it hits 40% humidity, the misters kick in.
4. Custom LED Spectrum Settings

Moss does not need much light, but it needs the right light. Standard office bulbs are too yellow. I use Philips Hue strips for my Plant Feature Wall projects. I set them to a cool white with a hint of blue. This mimics the light under a forest canopy. In a dark hallway in Chicago, these lights kept the moss green for two years. Without them, the moss stretches and loses its tight shape.
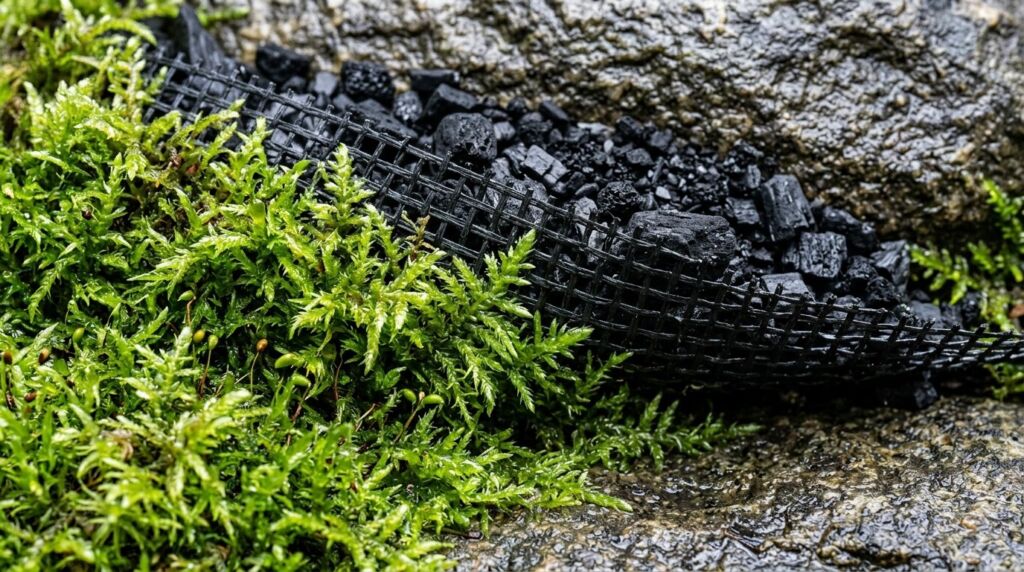
5. Anti Fungal Substrate Layers

Wet moss and stone can grow mold. This is the secret nobody tells you. You must use a layer of charcoal or anti fungal mesh behind the moss. I saw a beautiful Moss Wall Art Living Room piece rot in six months because of mold. The owner had to throw the whole thing away. I now spray the backing with a mild vinegar and water mix before I put the moss down. It keeps the air fresh and the moss healthy.
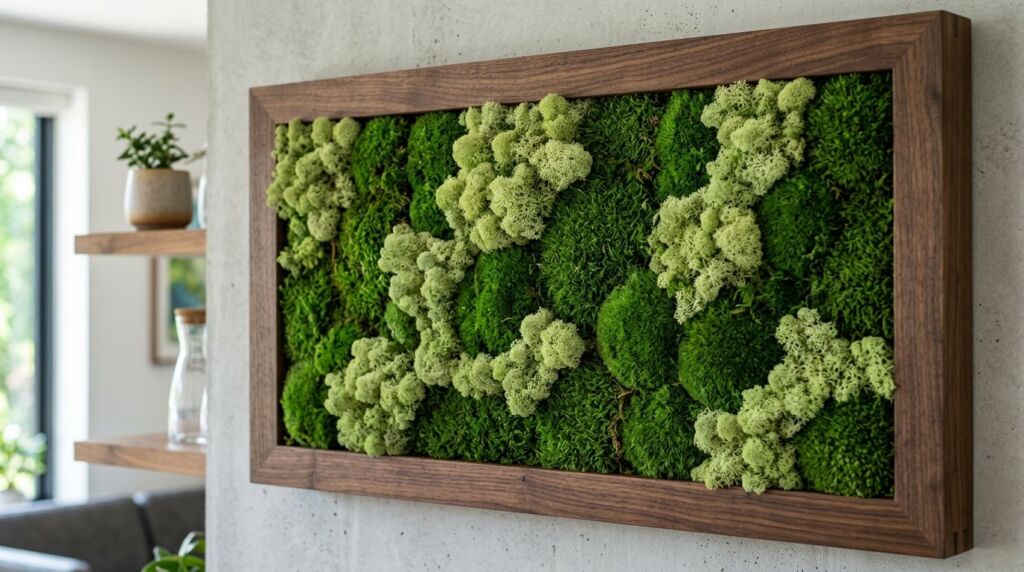
6. Framing Techniques for Depth
A moss wall without a frame looks like a patch of grass on a wall. It needs a border. I use reclaimed wood or black metal frames. This creates a shadow box effect. In my own home, I used a six inch deep oak frame. I layered the stone at the bottom and the moss at the top. This depth makes the Moss Walls look like they are growing out of the wall. It turns a decoration into a piece of fine art.
7. Sound Absorption Hacks

One big reason I put an Office Moss Wall in loud spaces is the silence. Moss is an incredible sound dampener. In a New York law firm, the lobby was like an echo chamber. We installed a twelve foot moss and stone wall. The echo vanished instantly. The stone reflects high tones and the moss eats the low ones. If your room is loud, use thick reindeer moss. It has more surface area to catch the sound waves.
8. Scent Control for Natural Vibes

Live moss has a smell. It smells like dirt and rain. Some people love it. Others hate it. I use a tiny bit of cedar oil on the wooden frame. This mixes with the moss scent. It creates a forest smell that feels clean. In a small bathroom project, the moss smell was too strong. I added more stone and less live moss to fix it. Always test your moss in a small box for a week to see if you like the scent.
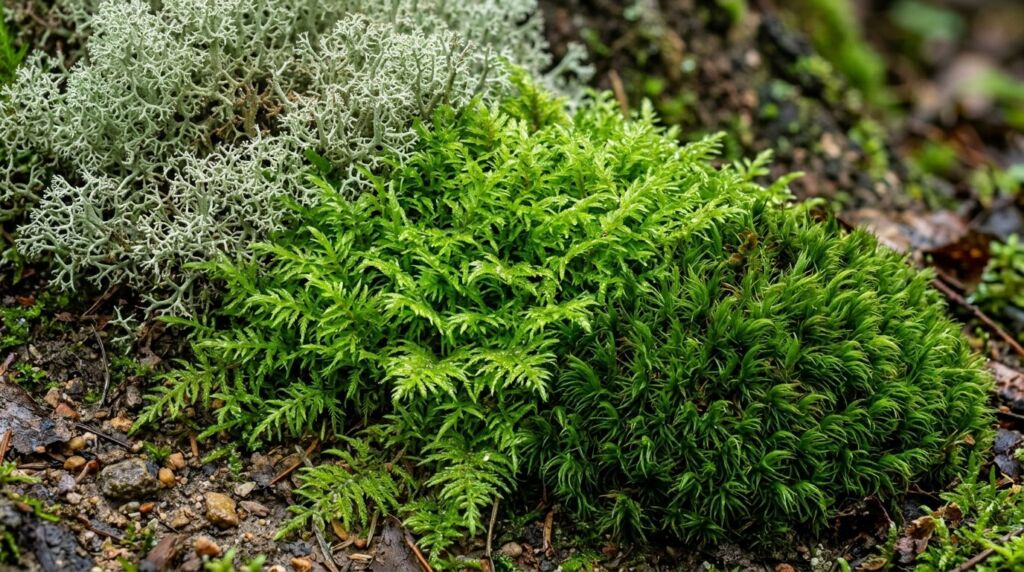
9. Layering Reindeer Moss with Sheet Moss
Texture is the key to a professional look. I never use just one type of moss. I mix fluffy reindeer moss with flat sheet moss. I tuck mood moss into the stone corners for a rounded look. I did this for a client who wanted a Biophilic Wall in their bedroom. We used three shades of green. The darker moss went in the shadows. The lighter moss went where the lights hit. It looked three dimensional and alive.
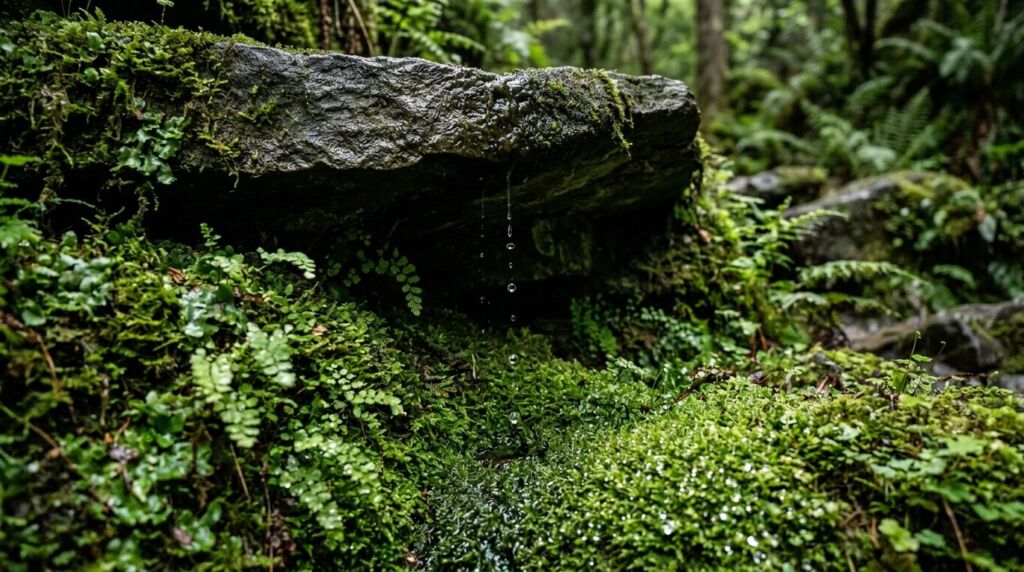
10. Vertical Irrigation Drip Lines
If your wall is over five feet tall, misting is not enough. The top stays wet and the bottom stays dry. I hide thin drip lines behind the top layer of stone. Gravity does the work. I used this for a Living Moss Wall in a hotel lobby. Water slowly seeps down through the moss. This keeps the whole wall evenly wet. You just need a small pump and a bucket of water hidden at the base.
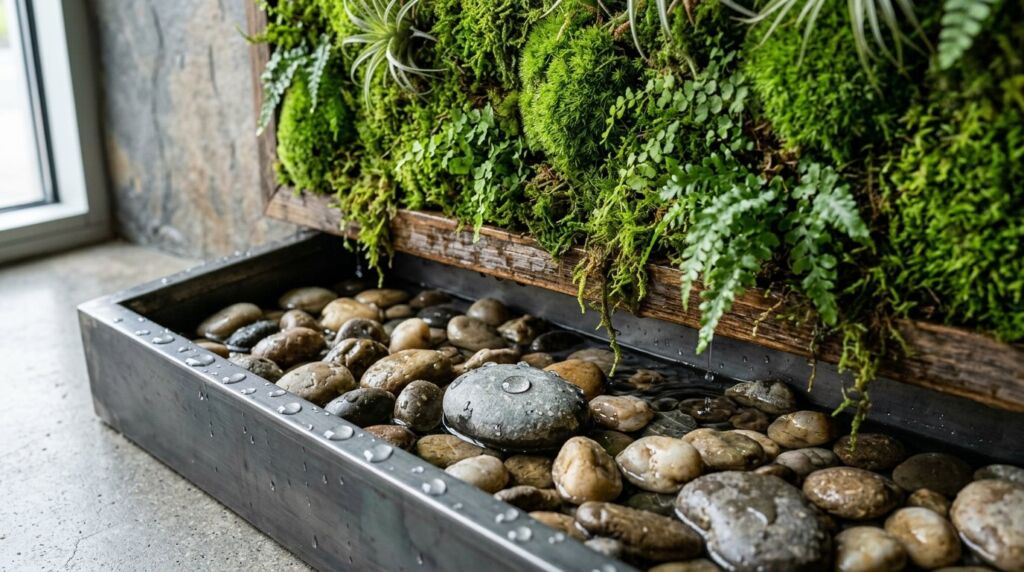
11. Hidden Drainage Trays
Water has to go somewhere. If you don’t have a tray, your floor will rot. I hide a narrow plastic tray at the bottom of the frame. I cover it with river stones. This catches the extra mist and drips. In a luxury condo, we forgot the tray. The wood floors warped in a month. It was a three thousand dollar mistake. Now, a drainage tray is the first thing I install.
12. Stone Veneer vs Real Stone
Real stone is heavy and hard to cut. I prefer stone veneer flats. They are half an inch thick. You can cut them with a standard wet saw. They look exactly like real stone once they are on the wall. I used these for a Plant Feature Wall in a kitchen. We used a “stacked stone” style. It gave us deep pockets to tuck the moss into. It looks like an old stone wall that nature took back.
13. Fern and Moss Co Planting
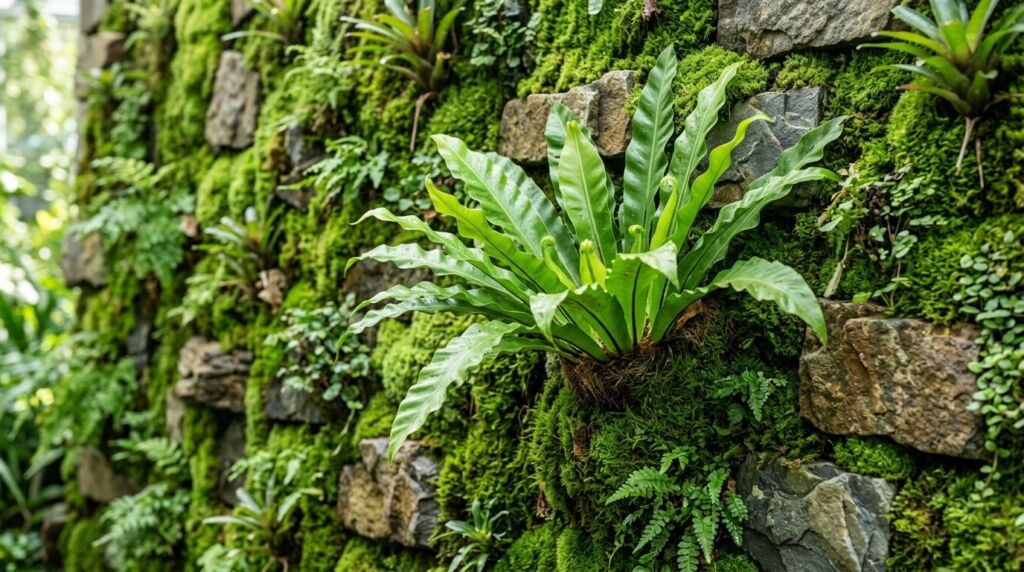
Moss looks better with friends. I love adding small ferns or air plants to my Living Moss Wall. They grow well together. In a sunroom project, I tucked three bird nest ferns into the moss. The ferns grew huge because the moss kept their roots wet. It creates a “jungle” look that moss alone cannot reach. Just make sure the plants you choose like low light and high moisture.
14. Seasonal Lighting Adjustments
Your moss needs more light in the winter. The sun moves and your room gets darker. I use a timer that changes with the seasons. In the summer, the lights stay on for six hours. In the winter, I bump it to nine hours. I saw a wall in Boston die in February because the owner didn’t change the light settings. Moss doesn’t go dormant like trees. It needs food all year long.
15. Bug Prevention in Live Systems
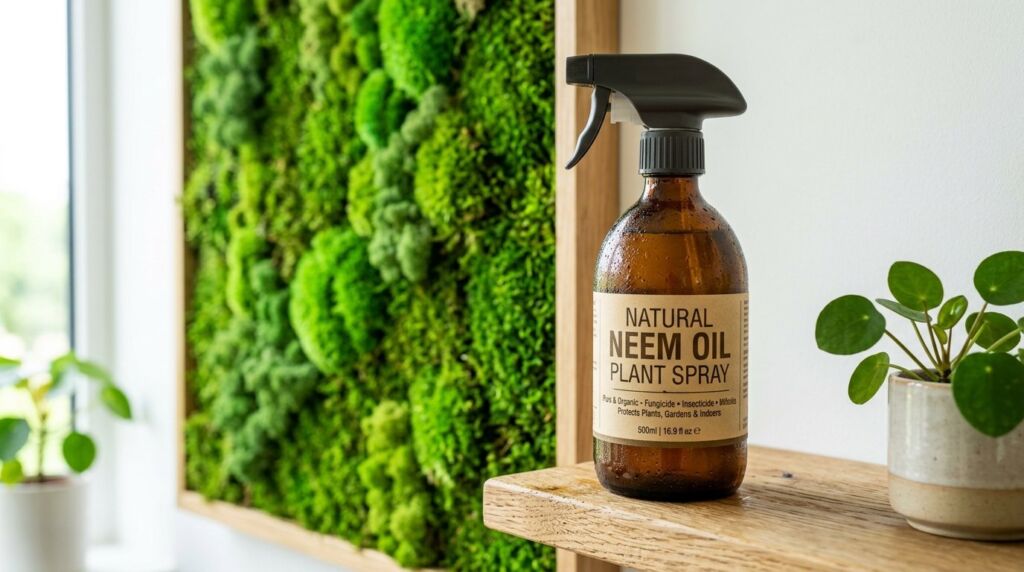
Bugs love wet moss. Small gnats are the main problem. I use a natural neem oil spray once a month. I learned this after a Moss Wall Art Living Room project started a gnat infestation. The client was furious. Now, I treat all my moss before it enters a home. I also use a layer of fine sand under the moss to stop bugs from laying eggs in the dirt.
16. Glue Selection for Durability
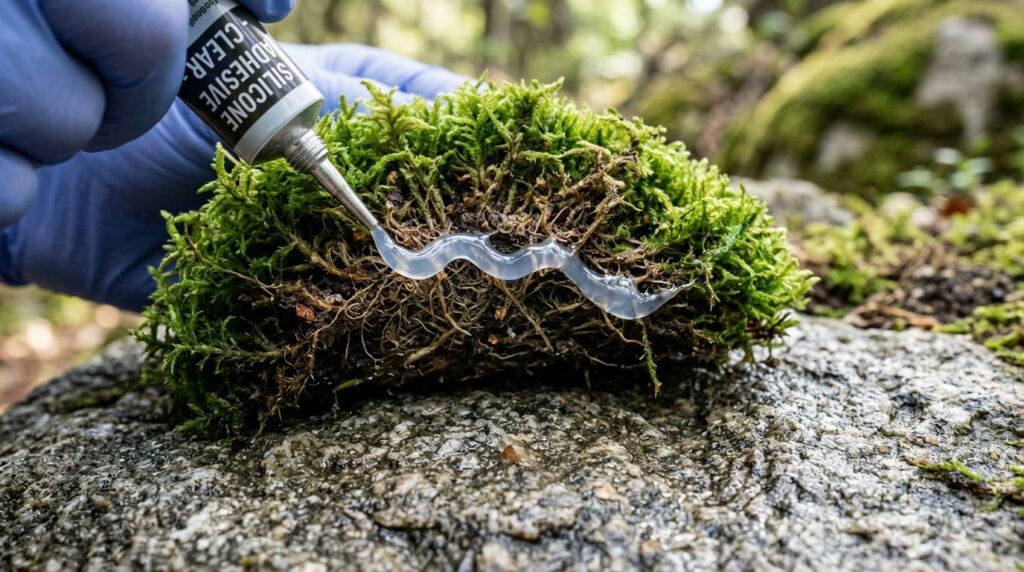
Not all glue works with moss. Cheap hot glue will fail when it gets wet. I only use GE Silicone II or Gorilla Glue Construction Adhesive. These stay flexible and do not care about water. In a restaurant project, the moss started falling off the stone after two months. We had used a water based glue. We had to redo the whole wall. Use the strong stuff from the start.
17. Managing Algae on Stone
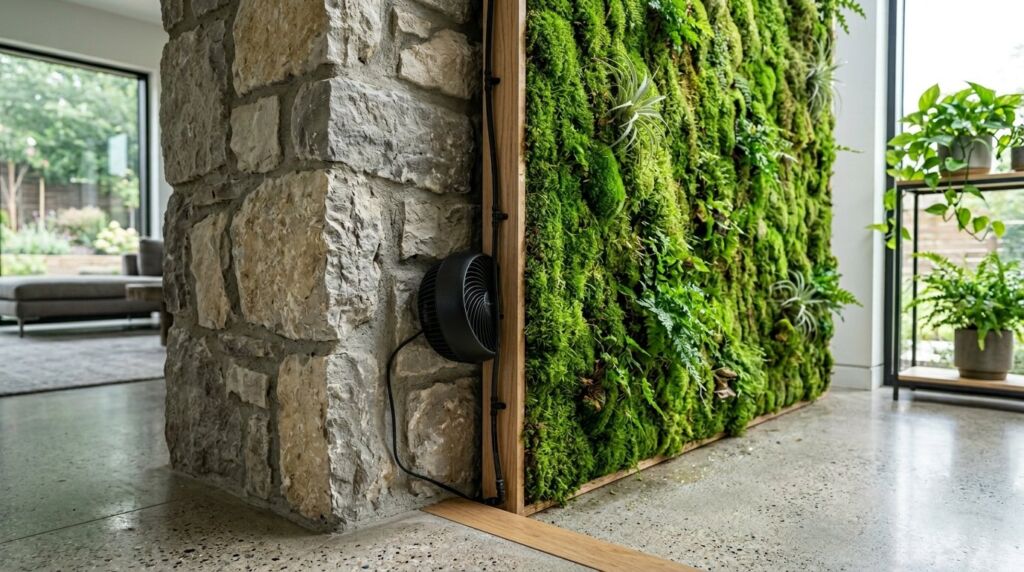
If your stone stays too wet, it will grow green slime. This is not the moss you want. It is algae. It smells bad and looks slick. I keep the air moving with a small, hidden fan. This dries the surface of the stone while the moss roots stay wet. I had to fix this in a basement spa. The air was too still. A ten dollar fan solved the whole problem.
18. Office Humidity Equilibrium

An Office Moss Wall acts like a giant sponge. It will pull moisture from the air or release it. In a dry office, the moss will dry out the air even more. I tell my clients to keep a humidifier in the room. This keeps the moss happy and the people healthy. It stops the “dry throat” feeling you get in big buildings. It makes the office feel like an oasis.
19. Texture Transitions on Large Walls

On a big wall, you cannot just slap moss everywhere. It looks messy. I create “flows” of stone that look like a dry creek bed. I put the thickest moss on the edges of the stone. This creates a natural transition. I did this on a twenty foot wall in a mall. We started with big stones at the bottom and moved to fine moss at the top. It guides the eye and looks professional.
20. Repairing Patchy Spots

Moss will die in spots. It is just part of the game. I keep a bag of “patch moss” in my garage. When a spot turns brown, I pull it out and glue in a new piece. I do a check every three months. It takes ten minutes to fix. Most people ignore the brown spots until the whole wall looks bad. Don’t be that person. Treat it like a garden and weed out the dead parts.
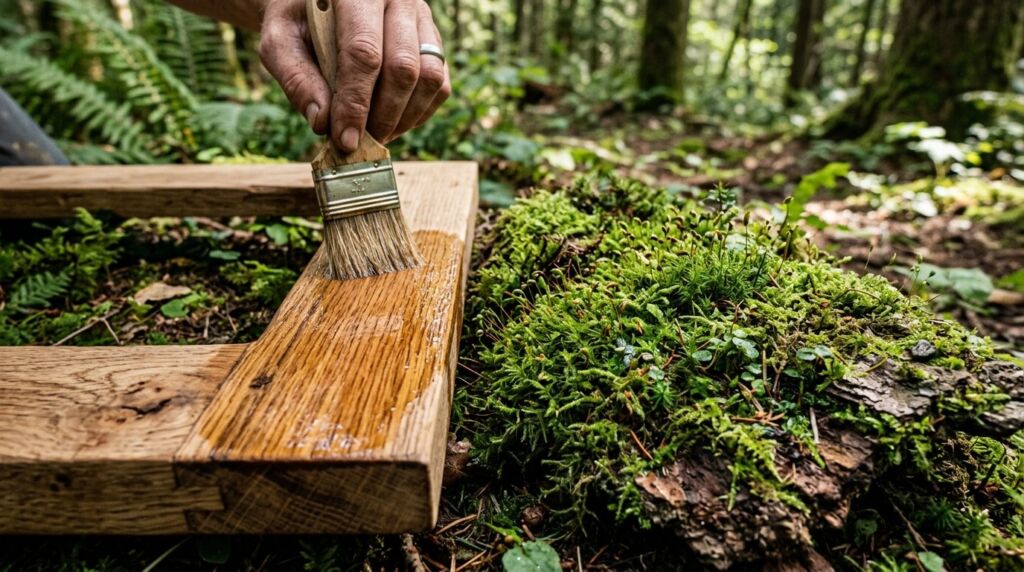
21. Natural Log Integration

For the ultimate forest look, I add pieces of ghost wood or cork bark. I screw these into the backing before I add the stone or moss. The moss grows over the wood and makes it look ancient. I used a large piece of driftwood in a Moss Walls project for a tech firm. It became the focal point of the whole room. It adds a skeletal structure that stone and moss alone lack.
The Gear List
You cannot do this with just your hands. Here are the tools I use for every How To Make Moss Wall Art project.
| Tool Name | Why You Need It | Best Brand |
| Hygrometer | Tracks room humidity | Govee |
| Silicone Glue | Bonds moss to stone | GE Silicone II |
| Wet Saw | Cuts stone veneer | DeWalt |
| Spray Bottle | Daily misting | Barbershop Mist |
| Grow Lights | Keeps moss green | Philips Hue |
| Drill | Mounting the backing | Bosch |
| Safety Glasses | Protecting your eyes | 3M |
| Cork Backing | Lightweight base | Moss Acres |
I have tried cheap versions of these. They break. Buy the good tools once and you will save money in the long run. The Bosch drill and DeWalt saw are heavy but they last ten years. The Govee sensors are a life saver because they send an alert to my phone when the moss is too dry.
The Good and the Bad
This project is a commitment. Here is the honest truth about Moss Walls.
The Good
- It cleans the air and adds oxygen.
- It looks better than any painting.
- It makes a room quiet and calm.
- It brings the outside in without the dirt of a garden.
The Bad
- It can be expensive to start.
- Live moss needs a lot of water and care.
- It can attract bugs if not treated.
- It is heavy and needs a strong wall.
If you are lazy, go with preserved moss. It looks 90% as good but needs zero water. If you love gardening, go with a Living Moss Wall. The reward is worth the work.
Frequently Asked Questions
How long does a moss wall last?
A preserved wall can last ten years. A live wall lasts as long as you care for it. I have seen live walls thrive for five years with the right light and water. If you ignore it, it will die in a month.
Is moss wall art hard to maintain?
It is like having a pet. You need to check the water and light every day. Once you have a schedule, it takes five minutes a day. The smart misters make it much easier.
Does it smell like a swamp?
Not if you have air flow. A healthy wall smells like a forest after rain. If it smells like a swamp, you have too much water and not enough air. Turn on a fan.
Can I put a moss wall in a bathroom?
Yes. Bathrooms are great because of the steam from the shower. It is the perfect place for a Live Moss Wall. Just make sure there is a window or a grow light.
How much does it cost?
A small DIY piece can cost $100. A large Office Moss Wall can cost $5000 or more. The stone is usually the most expensive part. Moss is cheap if you buy it in bulk.
Final Thoughts
Building a Plant Feature Wall changed the way I look at my home. It is not just about looks. It is about how the room feels. I find myself sitting near the moss wall when I am stressed. The mix of cold stone and soft moss is a perfect balance. Start small. Build a one foot square piece for your desk. See if you like the care routine. If you do, go big. There is no limit to what you can create with these 21 secrets.