Your bedroom ceiling often stays bare and boring. This is a missed chance for luxury. I remember my first attempt at draping velvet in my studio apartment back in 2019. I used cheap command hooks and heavy theater velvet. The whole thing fell on me at three in the morning. It was a dusty, heavy mess. That failure taught me about fabric weight and proper anchors. Velvet brings a weight and warmth that regular cotton cannot match. It absorbs sound and light. This creates a cave of comfort that helps you sleep deeper. If you want a space that feels like a high end hotel in Paris, velvet is the answer. We will look at how to hang it, what hardware to buy, and how to avoid the mistakes I made.
Executive Summary for Luxury Room Design
This guide provides a total plan for using heavy velvet to change your bedroom. You will see 17 specific ways to hang fabric from your ceiling. We cover everything from simple center swags to full room wraps. You will find details on costs which usually range from 400 to 2500 dollars. I include a list of 10 tools you must have. We talk about fire safety and dust control because these matter for long term use. Many people think velvet is too heavy for DIY projects. I show you how to use professional grade anchors to keep your ceiling safe. We also look at light setups that make the velvet glow. By the end of this article, you will know exactly how much fabric to buy and which hanging style fits your room height.
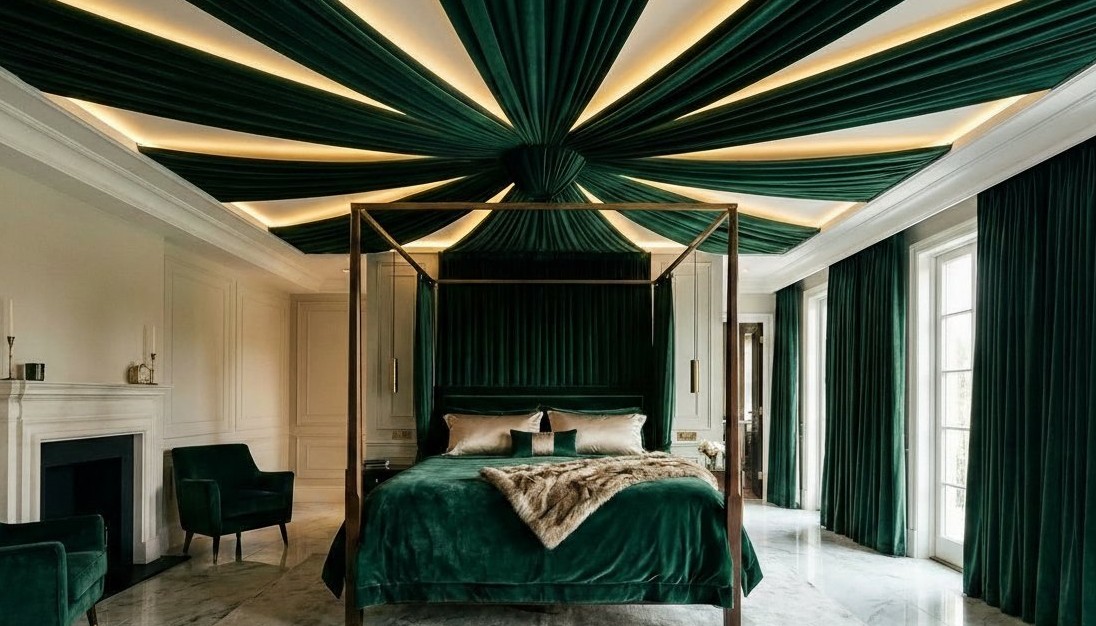
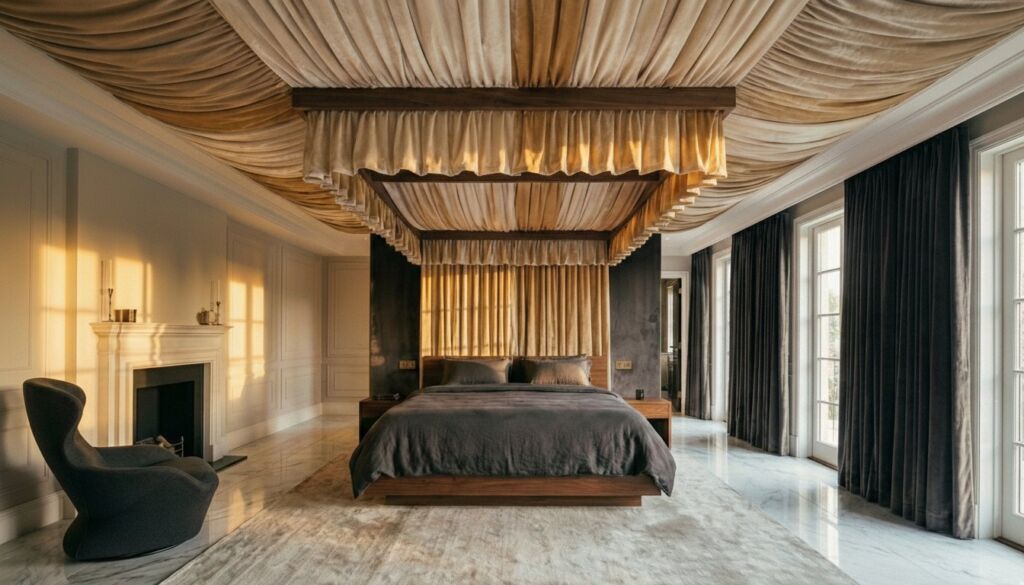
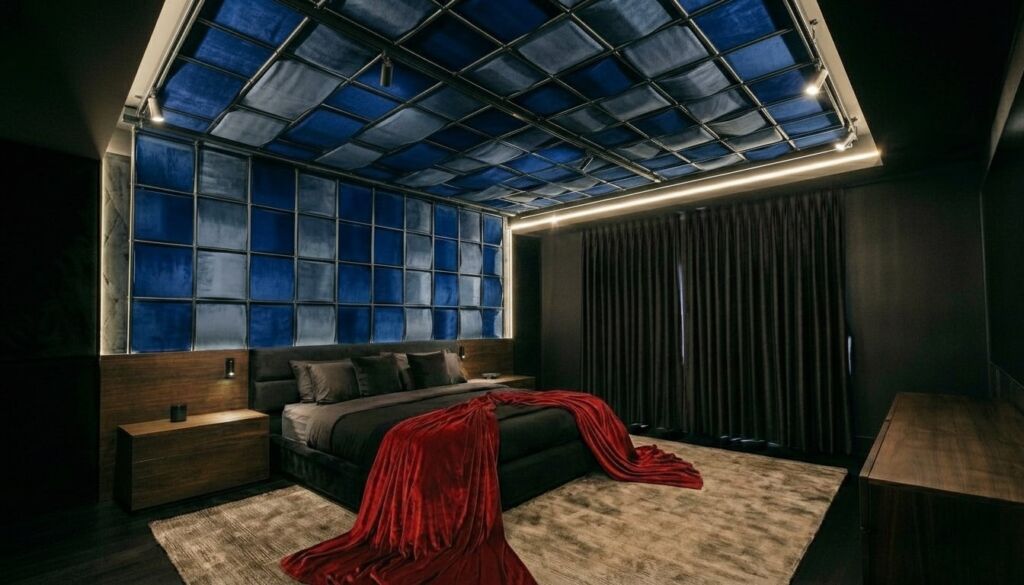
1. The Central Starburst Swag
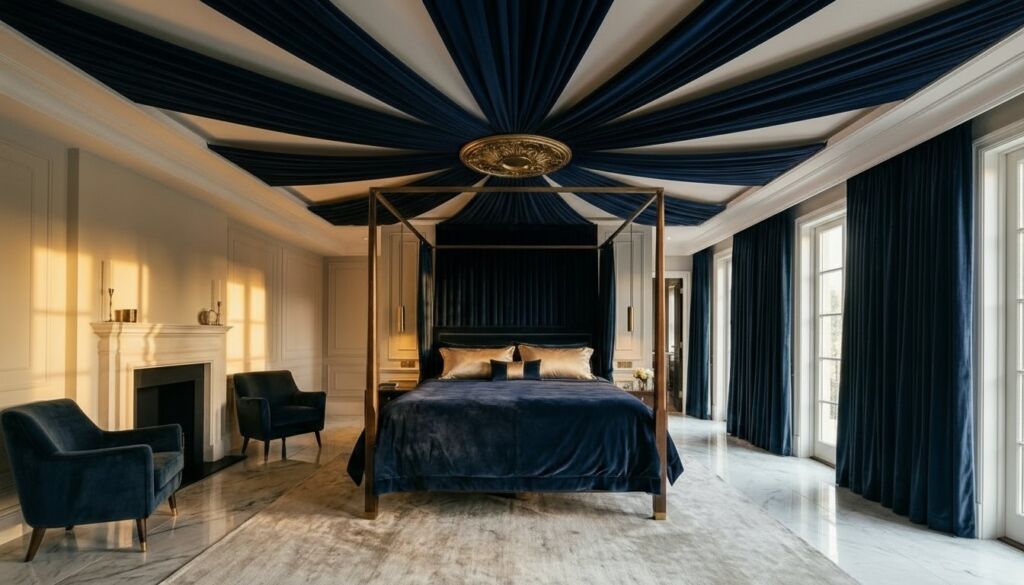
This layout uses one central point on the ceiling. You pull four or six long panels of velvet toward the corners of the room. It looks like a tent but feels like a palace. Use a heavy duty circular mounting plate in the center. I suggest a 300 GSM velvet for this. It has enough weight to hang well but will not pull your drywall down. In my 2022 project for a client in Seattle, we used navy blue velvet. The way the light hit the folds from the center point was stunning. You need to measure the distance from the center to each corner carefully. Add two feet to every measurement for the sag. If the fabric is too tight, it looks like a cheap tent. The sag is where the drama lives.
2. The Waterfall Wall To Ceiling Transition
This style starts halfway up the wall behind your headboard. The velvet climbs the wall and then moves across the ceiling for three or four feet. It creates a seamless flow of texture. This is perfect for rooms with low ceilings. It draws the eye up and makes the wall feel infinite. Use a flat curtain track mounted to the ceiling. You want the fabric to look like it is growing out of the wall. I recommend a crushed velvet for this. The way it catches light at different angles adds depth. Avoid using rods here because they create a gap. You want a flush mount.
3. The Triple Tiered Canopy
Why use one layer when you can use three? This idea involves hanging three different lengths of velvet at different heights. Use rectangular frames made of lightweight PVC or wood. Wrap the frames in the same velvet to hide the structure. This adds incredible volume. I saw this in a boutique hotel in London and it changed my view on room height. It creates a nested feeling. Use a lighter weight velvet for the top layers and the heaviest for the bottom. This prevents the top from looking bulky. You will need strong toggle bolts for this. Do not trust standard screws.
4. The Industrial Pipe Frame
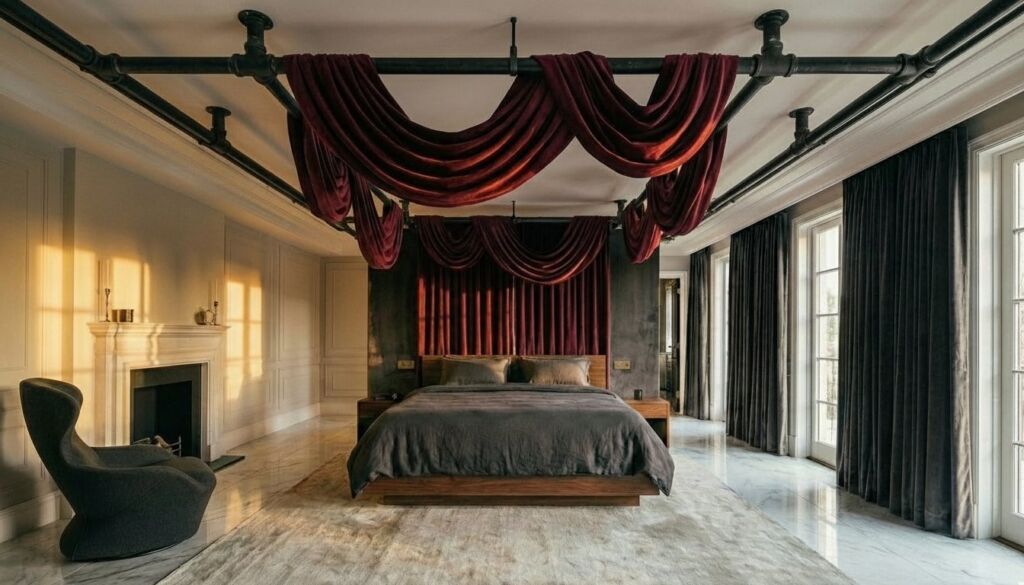
If you like a mix of hard and soft, use black iron pipes. Build a frame that sits six inches below the ceiling. Loop the velvet over the pipes. The contrast between the cold metal and the soft plush fabric is striking. This works best in lofts or modern bedrooms. You do not need to sew anything. Just buy velvet by the yard and let it drape. The raw edges can even stay hidden in the folds. I used this in a basement renovation last year. It helped hide ugly pipes while looking very intentional. Use one inch thick pipes for the best visual balance.
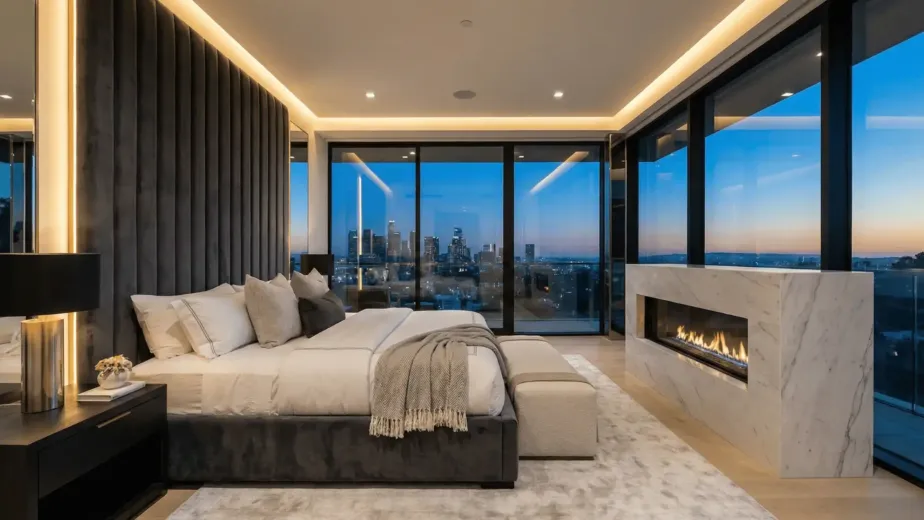
5. The Hidden LED Glow Path
Velvet is great at soaking up light. Use this to your advantage. Mount your velvet panels two inches away from the wall using a spacer. Place LED strips behind the fabric edge. The light will bleed through the pile of the velvet. It creates a soft halo effect. This is the best way to handle mood lighting. I suggest using a champagne or silver velvet for this. Darker colors like black or forest green will soak up too much of the light. Make sure the LEDs are heat safe. Velvet can hold heat so airflow is important.
6. The Crossed Scissor Drape

This involves two long strips of velvet that cross each other in the middle of the ceiling. It forms an X shape. It is simple but effective. You only need five points of contact: the four corners and the center. Use large decorative rings to hold the fabric. This allows you to adjust the tension easily. I found that using contrasting colors works well here. Try a deep burgundy crossed with a charcoal grey. It adds a layer of visual interest that a single color lacks. This style is also the easiest to take down for cleaning.
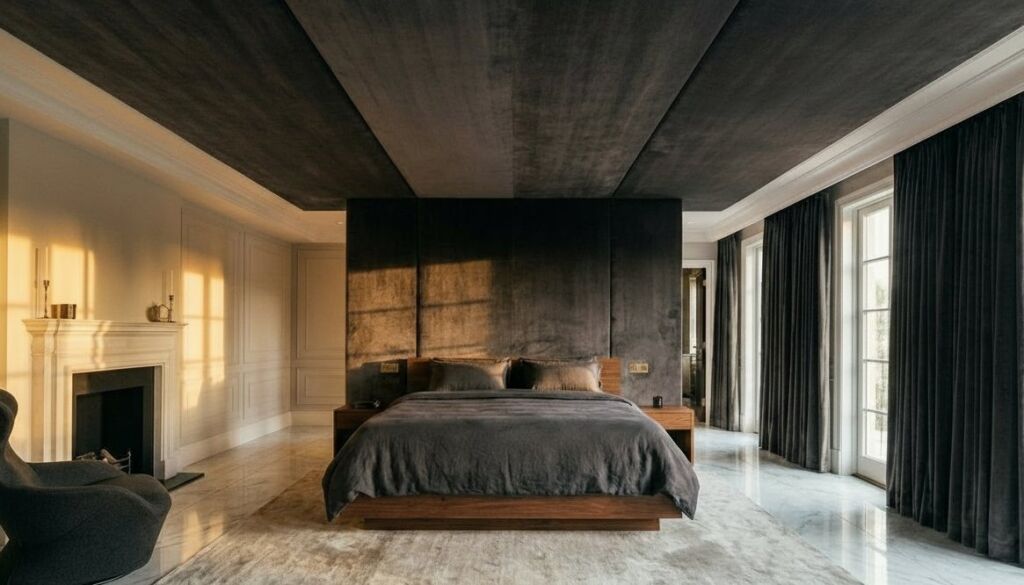
7. The Full Ceiling Padded Wrap
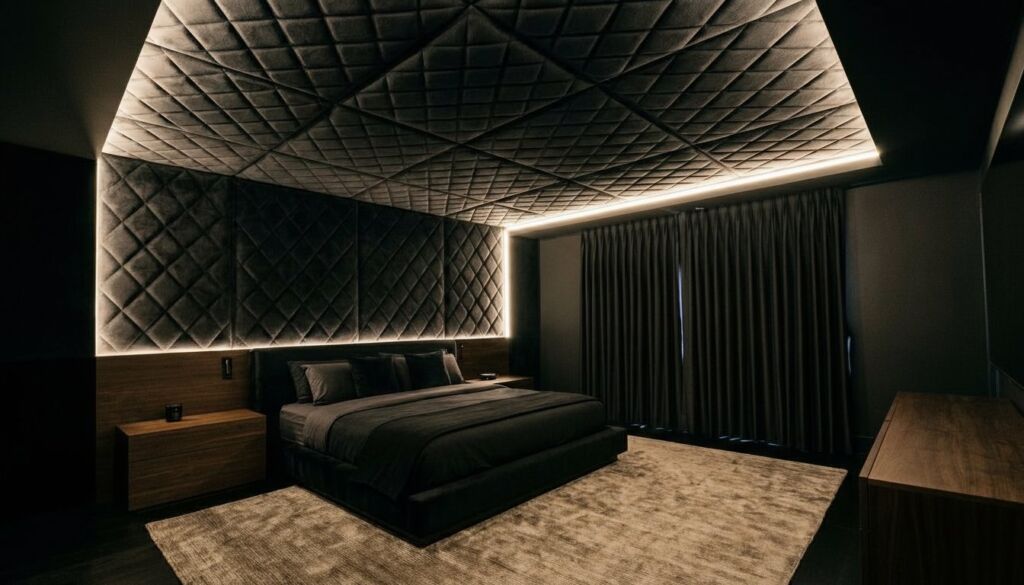
This is for the person who wants total silence and luxury. You cover the entire ceiling surface with velvet. You do not drape it. You staple it flat or use adhesive panels. This requires a professional or a very patient DIYer. It turns the room into a recording studio quality space. The acoustics become soft and warm. I did this in my own home office. It stopped the echo completely. Use a foam backing for a quilted look. This is expensive but it is the ultimate statement. It works best in small, square rooms.
8. The Floating Cloud Panels
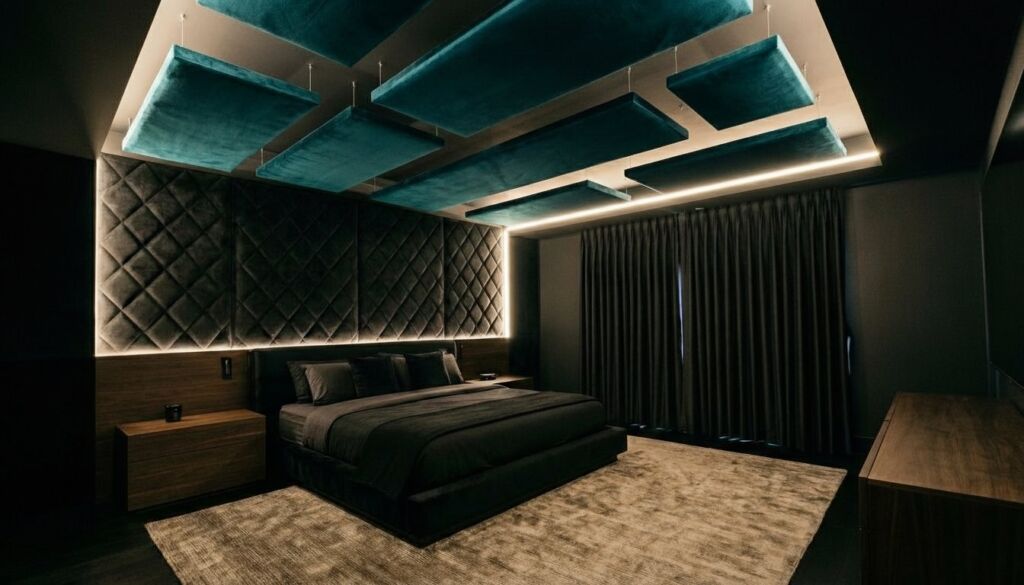
Hang three or four large rectangular panels of velvet horizontally. Use thin wire cables so the panels look like they are floating. This is a very modern take on draping. It allows you to see the ceiling above which adds a sense of air. It is less claustrophobic than a full drape. Space the panels evenly. This is great for hiding popcorn ceilings without a full renovation. I recommend using a velvet with a high sheen. The flat panels will reflect light better than draped ones. Use 1/16 inch steel cable for a nearly invisible look.
9. The Victorian Crown Hoop
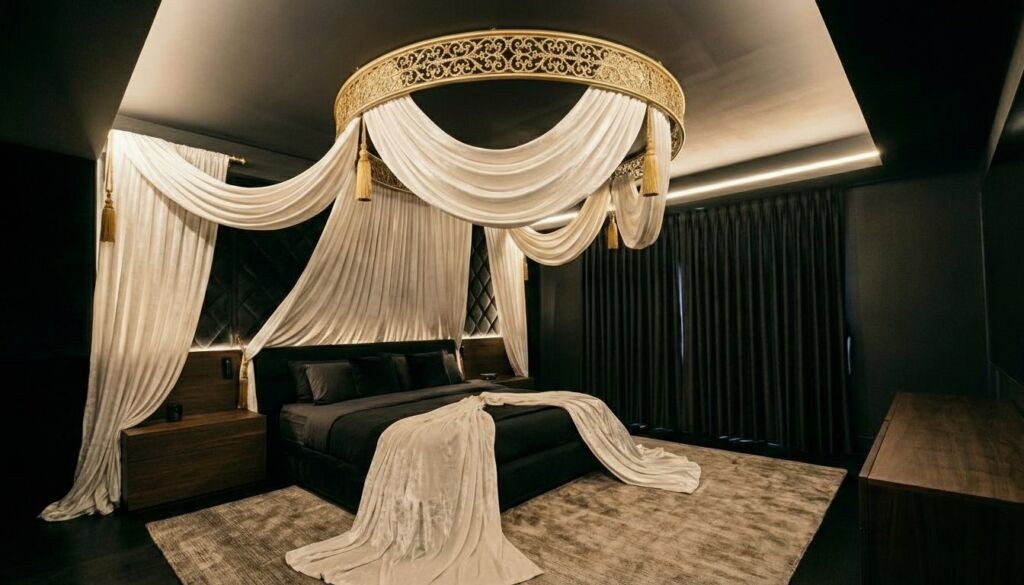
Buy a large hula hoop or a specialized bed crown. Mount it directly above the center of the bed. Drape the velvet through the hoop so it falls in a circular pattern. This is a classic royal look. It focuses all the attention on the bed. I like to use heavy tassels to weigh down the ends of the fabric. This keeps the drapes in place when the ceiling fan is on. One mistake people make is using a hoop that is too small. Go for at least 30 inches in diameter. This allows the fabric to breathe and flare out.
10. The Asymmetrical Side Sweep
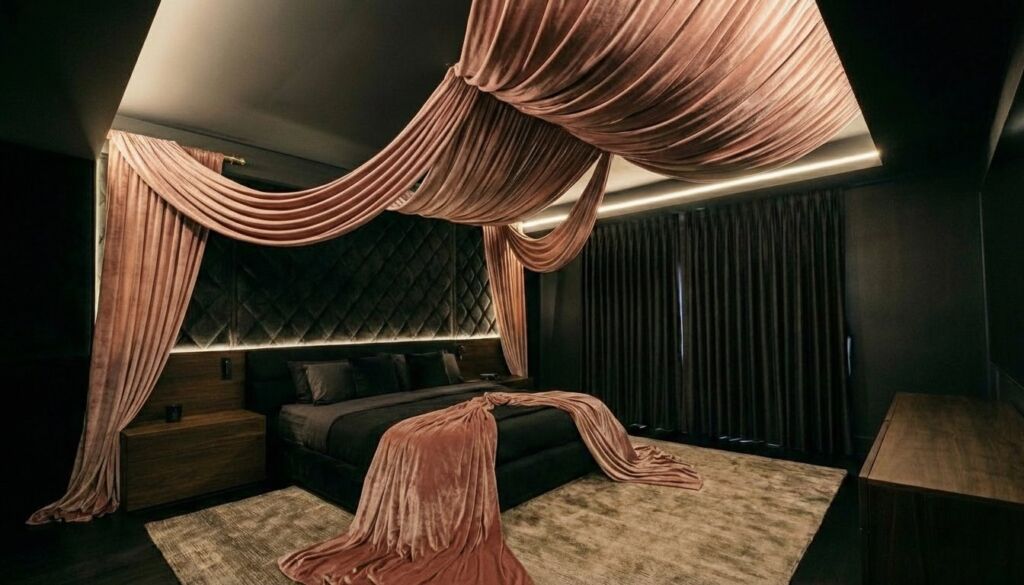
You do not have to be symmetrical. Drape the velvet from one corner of the room to the opposite side of the bed. This creates a sense of movement. It feels more like art than a bed topper. Use a decorative branch or a piece of driftwood as the mounting point for a rustic touch. I used this method in a beach house project. The velvet was a seafoam green. It looked like a wave frozen in time. This style uses less fabric so it is cheaper. It also leaves more room for tall lamps or wall art on the other side.
11. The Pleated Theatre Style
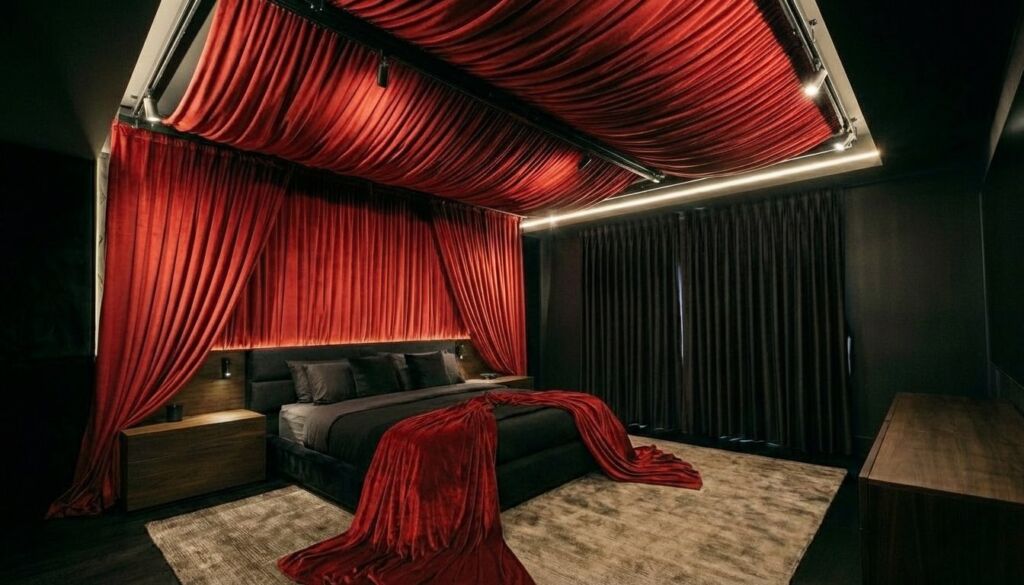
This uses a lot of fabric. You create tight, vertical pleats across the ceiling. It looks like the top of a grand stage. You will need a heavy duty track system like those from Kirsch or Silent Gliss. The pleats stay in place and provide a very formal look. This is the most “dramatic” option on the list. It requires a lot of sewing or a high end workroom. I suggest using a matte velvet for this. The pleats create enough shadows on their own. Too much shine can make it look messy.
12. The Geometric Tension Grid
Use thin tension rods to create a grid on the ceiling. Weave the velvet over and under the rods. It creates a 3D woven effect. This is a very technical look. It works well if you have a lot of height to play with. You can change the pattern whenever you want. I recommend using two different shades of the same color. For example, use a light navy and a dark navy. The weaving makes the colors pop against each other. It also helps with sound dampening in rooms with hardwood floors.
13. The Minimalist Flat Swag
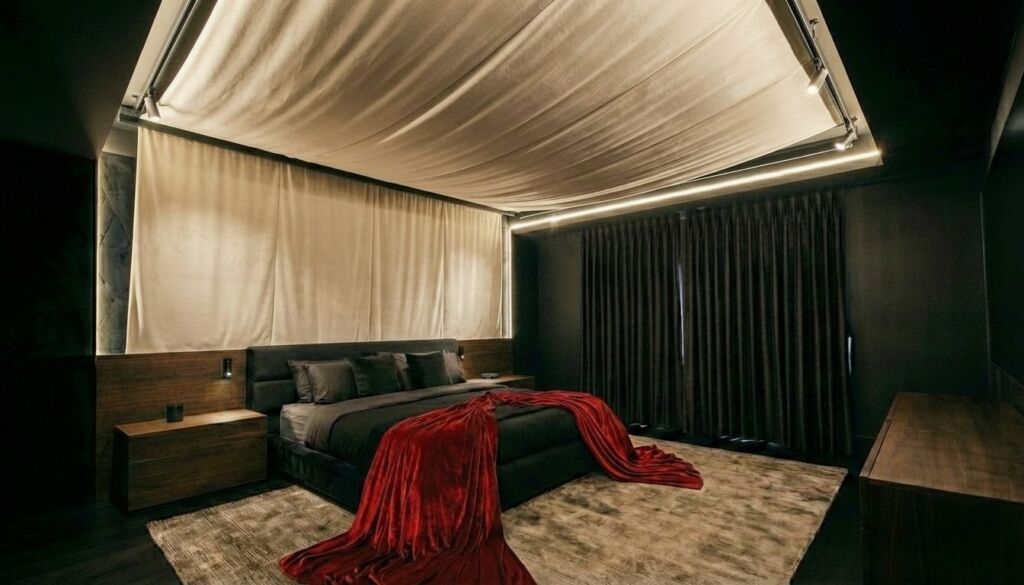
Sometimes less is more. Take one long piece of velvet. Secure it at the head of the bed and at the foot of the bed on the ceiling. Let it hang with just a four inch dip in the middle. It creates a soft “belly” of fabric. This is very calming. It does not overwhelm the room. I used this in a guest room last summer. The velvet was a soft cream color. It made the room feel expensive without being flashy. Use flat wooden cleats to hold the ends. This keeps the lines clean and sharp.
14. The Corner Cocoon
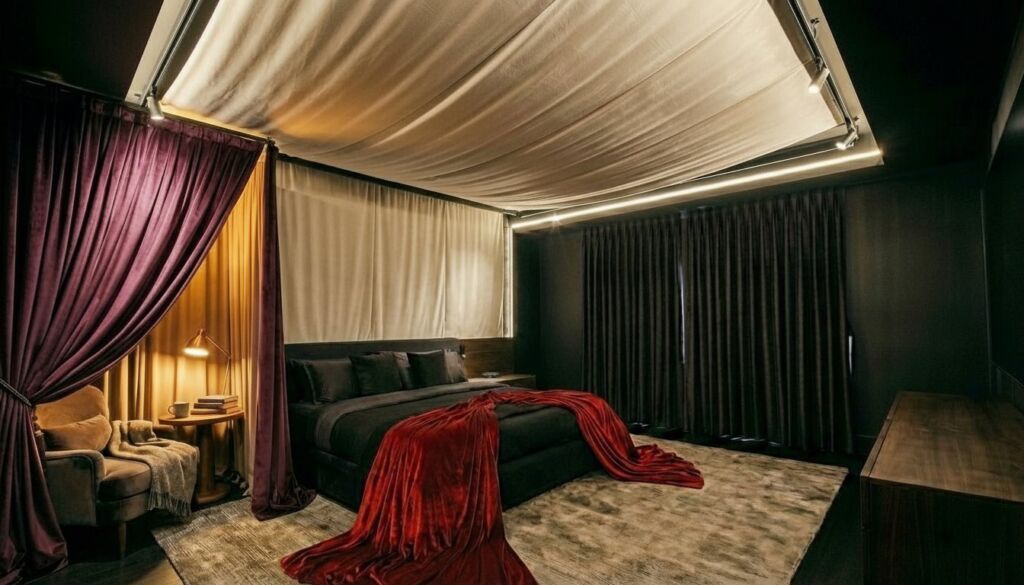
Instead of the whole ceiling, just focus on one corner. This is perfect for a reading nook inside a bedroom. Drape the velvet from two walls and meet in the corner of the ceiling. Let the fabric pool on the floor. It creates a private space within the room. I find that kids and teens love this style. Use a plush, thick velvet for maximum comfort. You can add a small pendant light inside the cocoon for a perfect reading spot. Make sure the light is an LED to avoid fire risks with the fabric.
15. The Striped Panel Mix
Combine velvet with another fabric like sheer silk or linen. Alternate strips of velvet and strips of the lighter fabric. This breaks up the weight of the velvet. It lets light pass through the sheer parts while the velvet adds texture. This is a great way to save money since velvet is pricey. I recommend a 2:1 ratio of velvet to sheer. It keeps the dramatic feel but adds a bit of breeze. This works well in warmer climates where a full velvet ceiling might feel too hot.
16. The Braided Velvet Cords
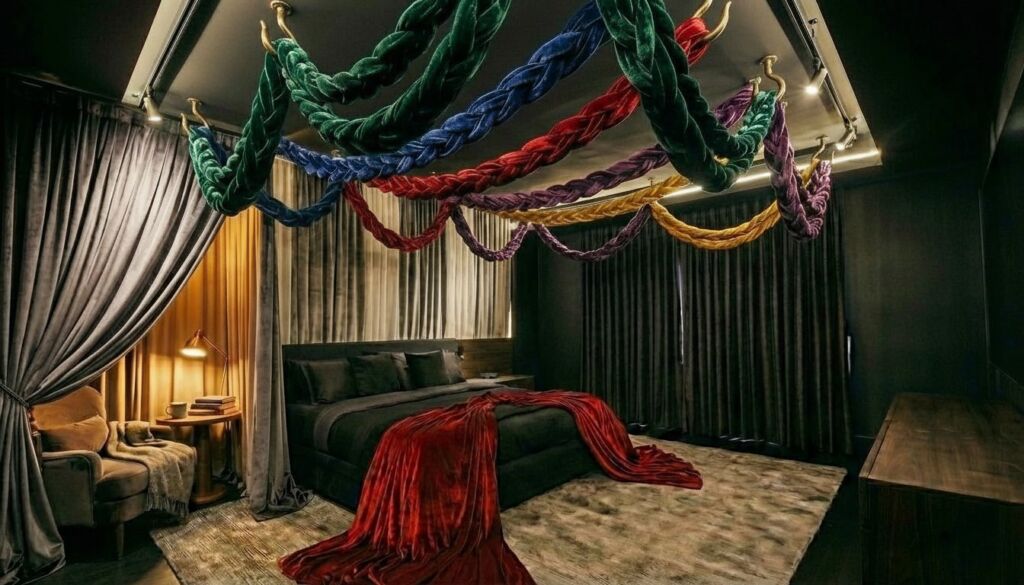
This is a DIY dream. Take long strips of velvet and braid them into thick ropes. Drape these ropes in loops across the ceiling. It looks like heavy nautical rope but in a luxury material. It is very tactile and unique. I have not seen many people do this. It is a great way to use up scrap velvet from other projects. Secure the loops with heavy duty brass hooks. The shadows cast by the braids are intricate and beautiful at night.
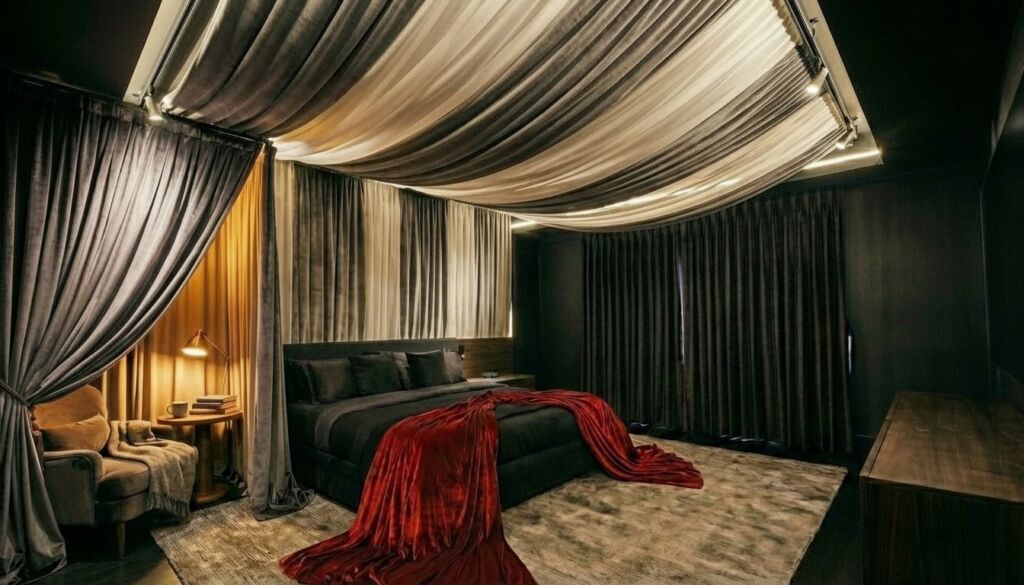
17. The Layered Ombre Swag
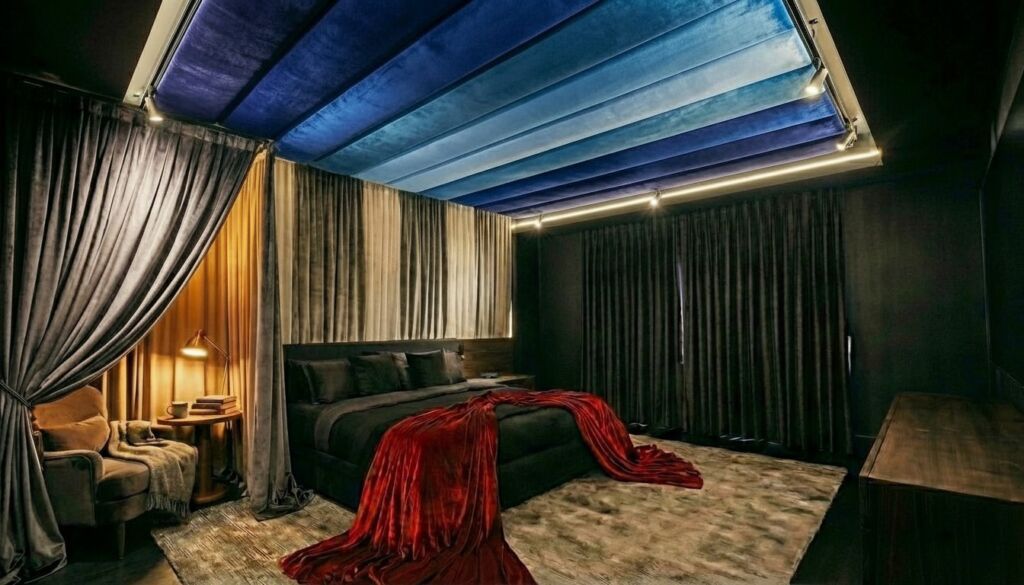
Buy velvet in four shades of the same color. Start with the darkest shade at the wall and move to the lightest shade in the center of the ceiling. This creates a “sky” effect. It is very soothing to look at while lying in bed. It mimics the natural gradient of the horizon. I did this with greys and it felt like a soft rain cloud. You need to be careful with the seams. Use a high quality fabric glue or a clean stitch to join the panels. It should look like one continuous piece of shifting color.
Comparison of Ceiling Draping Materials
This table helps you see why velvet stands out against other common choices.
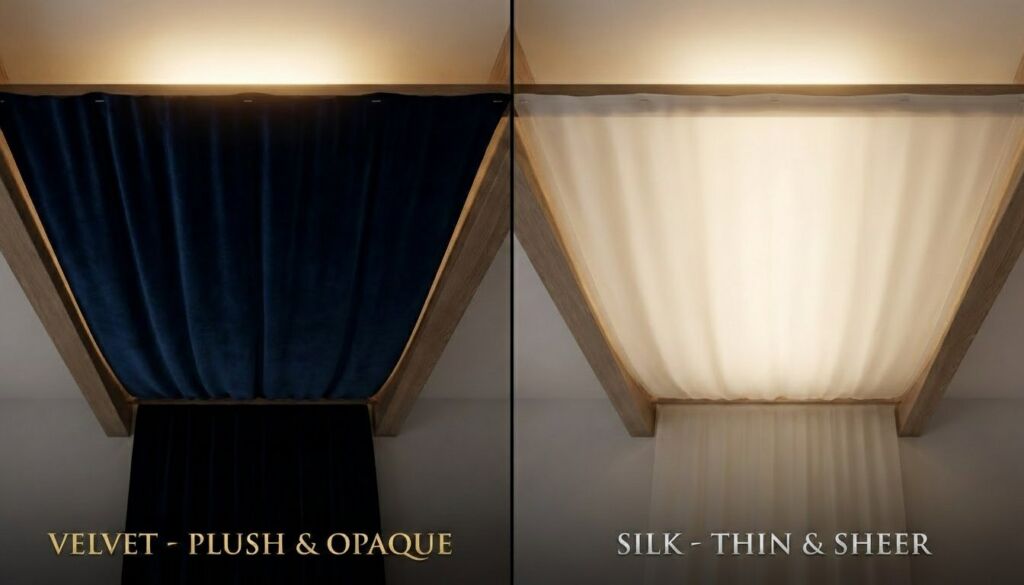
| Feature | Velvet | Silk | Cotton | Polyester Sheer |
| Weight | High (Heavy) | Low (Light) | Medium | Very Low |
| Light Block | 90-100% | 30-50% | 50-70% | 10-20% |
| Sound Dampening | Excellent | Poor | Fair | Poor |
| Durability | High | Low | Medium | High |
| Average Cost | $25-$60/yd | $30-$80/yd | $10-$25/yd | $5-$15/yd |
| Maintenance | Steam/Dry Clean | Dry Clean | Washable | Washable |
Critical Tools for Velvet Installation

You cannot just wing it with velvet. The weight will rip screws out of the ceiling. You need the right gear from the start.
- Stud Finder: You must find the ceiling joists. Do not hang heavy velvet from just drywall.
- Toggle Bolts: If you cannot hit a joist, use 1/4 inch toggle bolts. They hold up to 50 pounds each.
- Hand Steamer: Velvet gets crushed in shipping. You must steam it while it hangs to get the rich look.
- Fabric Scissors: Dull scissors will chew the velvet pile. Buy professional grade shears.
- Rotary Laser Level: This helps you keep your hooks perfectly straight across the room.
- Heavy Duty Staple Gun: Essential for flat wraps or securing edges to wooden cleats.
- Pneumatic Nailer: Use this for attaching decorative trim over the fabric edges.
- Heat Tape: For hemming the edges without a sewing machine.
- Ladder Stabilizer: Safety first when working on your back looking at the ceiling.
- Microfiber Cloths: To brush the velvet pile in one direction after you finish.
Cost Analysis and Budgeting
Luxury has a price. Here is what I spent on a typical 12×12 bedroom project last year. These numbers are based on 2024 market rates for mid-range materials.
- Fabric: 40 yards of 54 inch wide velvet at $30 per yard. Total: $1200.
- Hardware: Heavy duty tracks, hooks, and anchors. Total: $150.
- Tools: Steamer and laser level (if you do not own them). Total: $100.
- Lighting: LED strips and power adapters. Total: $80.
- Professional Labor: (Optional) A local handyman for 4 hours. Total: $300.
Total DIY Cost: $1530.
Total Professional Cost: $1830.
You can save money by buying “theatrical velvet” which comes in wider rolls. It is often cheaper but only comes in basic colors like black, red, and blue. For jewel tones, you will pay more.
Pros and Cons of Velvet Ceilings
Every design choice has a trade off. I have lived with a velvet ceiling for two years. Here is my honest take.
The Pros:
- Unmatched Intimacy: The room feels smaller in a good way. It feels like a hug.
- Sleep Quality: The darkness is absolute. If you work night shifts, this is a life changer.
- Acoustics: No more hearing the neighbors upstairs or the hum of the fridge.
- Instant Style: It covers ugly ceilings or bad paint jobs instantly.
The Cons:
- Dust Magnet: Velvet loves dust. You must vacuum it with a brush attachment every month.
- Heat Retention: It keeps the room warm. This is bad in Florida but great in Maine.
- Cost: It is much more expensive than a bucket of paint.
- Installation Difficulty: It is a two person job. Working overhead is tiring.
Frequently Asked Questions
Does velvet on the ceiling make a room look smaller?
Yes. Dark, heavy fabrics bring the ceiling down visually. This creates a cozy, dramatic feel. In a very small room, it can feel tight. In a large master suite, it adds necessary warmth. If you are worried, use a light color like cream or silver.
Is velvet a fire hazard on the ceiling?
It can be. Most residential velvet is not fire rated. I always recommend spraying your fabric with a fire retardant spray like Fire-Retardant Plus. This is a small cost for peace of mind. Also, keep all light bulbs away from the fabric. Use only cool-to-the-touch LEDs.
How do I clean a velvet ceiling?
Do not take it down. That is too much work. Use a handheld vacuum with a soft brush. For stains, use a damp cloth with very mild soap. Do not rub hard or you will ruin the pile. A steamer helps refresh the look and kill any dust mites.
Will the weight of the velvet damage my ceiling?
Not if you use the right anchors. A single panel of velvet might weigh 5 to 10 pounds. Spread across several hooks and anchored into joists, the weight is fine. If you just use nails in drywall, it will fail. Always use toggle bolts or hit the wood framing.
Can I use velvet in a humid climate?
Be careful. Velvet can hold moisture. If your room is damp, you might get mold behind the fabric. Make sure your room has good airflow. Use a dehumidifier if you live in a very humid area. Synthetic velvet blends handle moisture better than 100% cotton velvet.
How much extra fabric should I buy for swags?
A good rule is to add 20 to 30 percent to your linear measurements. If your ceiling is 10 feet long, buy 13 feet of fabric for that section. This allows for the natural dip and the wrap around the hooks. It is better to have too much than too little.
Can I do this in a rental apartment?
Yes. Use tension rods that press against the walls instead of drilling into the ceiling. You can also use heavy duty adhesive hooks, though they might peel paint when removed. The tension rod method is the safest for getting your security deposit back.
Final Thoughts on Your Bedroom Transformation
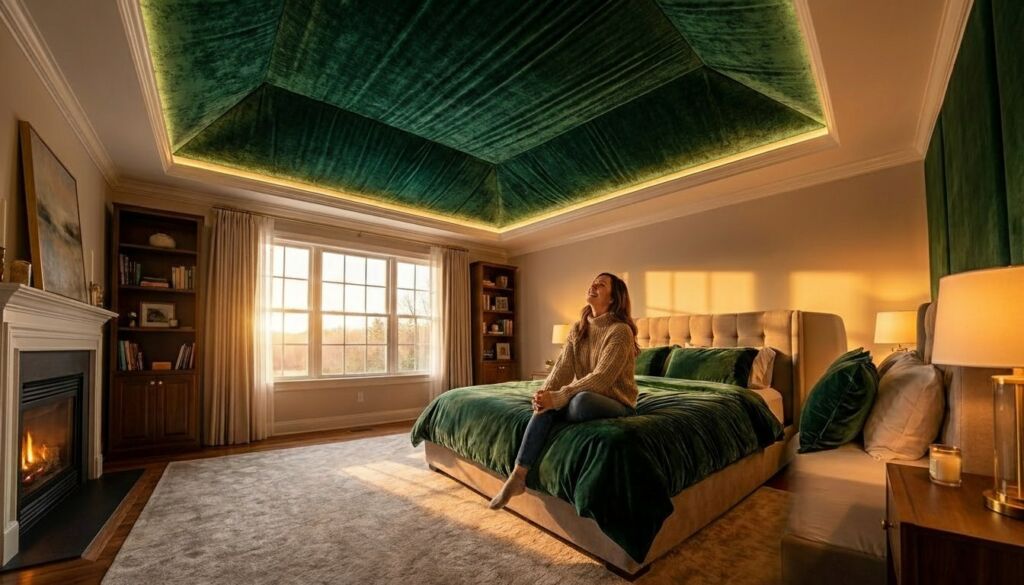
Adding velvet to your ceiling is a bold move. It is not for everyone. But if you crave a space that feels personal and private, it is the best choice. I have seen many trends come and go. Paint colors change every year. Velvet is timeless. It reaches back to old world luxury while fitting into modern design. Start with a small section if you are nervous. Maybe just a swatch behind the headboard. Once you feel the quiet and see the glow of the fabric, you will want more. My biggest regret with my first project was not going bigger. Don’t be afraid of the drama. Your bedroom should be the one place where you can be as dramatic as you want.
What color are you thinking for your project? I find that deep emerald green is the most popular choice this year. It looks amazing with gold hardware. If you have questions about specific hardware brands, leave a comment. I am happy to share what has worked for me on past jobs.