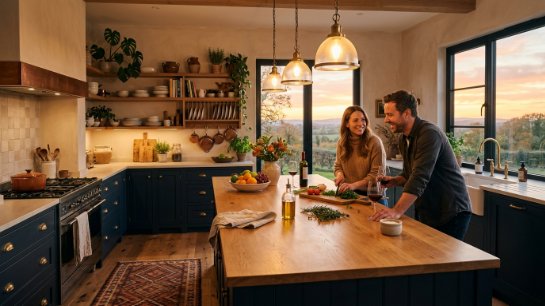
Last summer, I helped a friend renovate a cramped 1970s kitchen where two people could not stand back-to-back without a collision. We spent $12,500 on a custom central feature that changed everything about how they live. Does your current space feel like a constant traffic jam during meal prep? Are you tired of feeling isolated from guests while you cook? It is possible to turn a chaotic room into a functional hub without a massive footprint. I have seen how a single change in orientation fixes years of frustration. These setups focus on flow, utility, and real-world movement.
Executive Summary
This guide details 23 distinct arrangements designed for high-stakes home utility. You will find ways to balance walkway clearances—ideally 42 to 48 inches—with maximum storage capacity. I look at specific brands like IKEA SEKTION cabinetry and Kohler workstation sinks to show how specific hardware fits into different footprints. Whether you have a tight galley or a sprawling open plan, these kitchen layouts with island focus on the “work triangle” while adding at least 30% more prep surface. We cover cost ranges from $2,000 DIY builds to $25,000 professional installs. Expect to find data on material durability and the ROI of integrated appliances. We intentionally exclude outdoor kitchens to focus strictly on indoor residential floor plans.
1. Classic L-Shape
This setup utilizes two adjacent walls for cabinets while leaving the center open for a floating station. In my experience, this is the most versatile choice for medium-sized homes because it prevents the cook from being boxed in. I recently saw this work perfectly with a 4-by-6-foot center block using KraftMaid cabinets. Try placing your main sink on the perimeter and a small prep sink on the island to separate cleaning from chopping. This usually costs between $8,000 and $15,000 for the cabinetry alone. A common mistake is making the island too large, which chokes the walkway. Ensure you have at least 3.5 feet of clearance on all sides.
2. U-Shaped Efficiency
A U-shaped plan surrounds the chef on three sides, with the island acting as the fourth wall or a central anchor. This creates a high-output environment for those who cook daily. I find that a 36-inch wide island works best here to avoid a “caged” feeling. For example, using a Butcher Block top from John Boos adds a warm texture to a stainless steel environment. One practical action is to align the island with the open end of the U to create a natural buffet line for guests. Expect a slightly higher cost due to more corner cabinets. People often forget that corner carousels are expensive but necessary for this layout to function well.
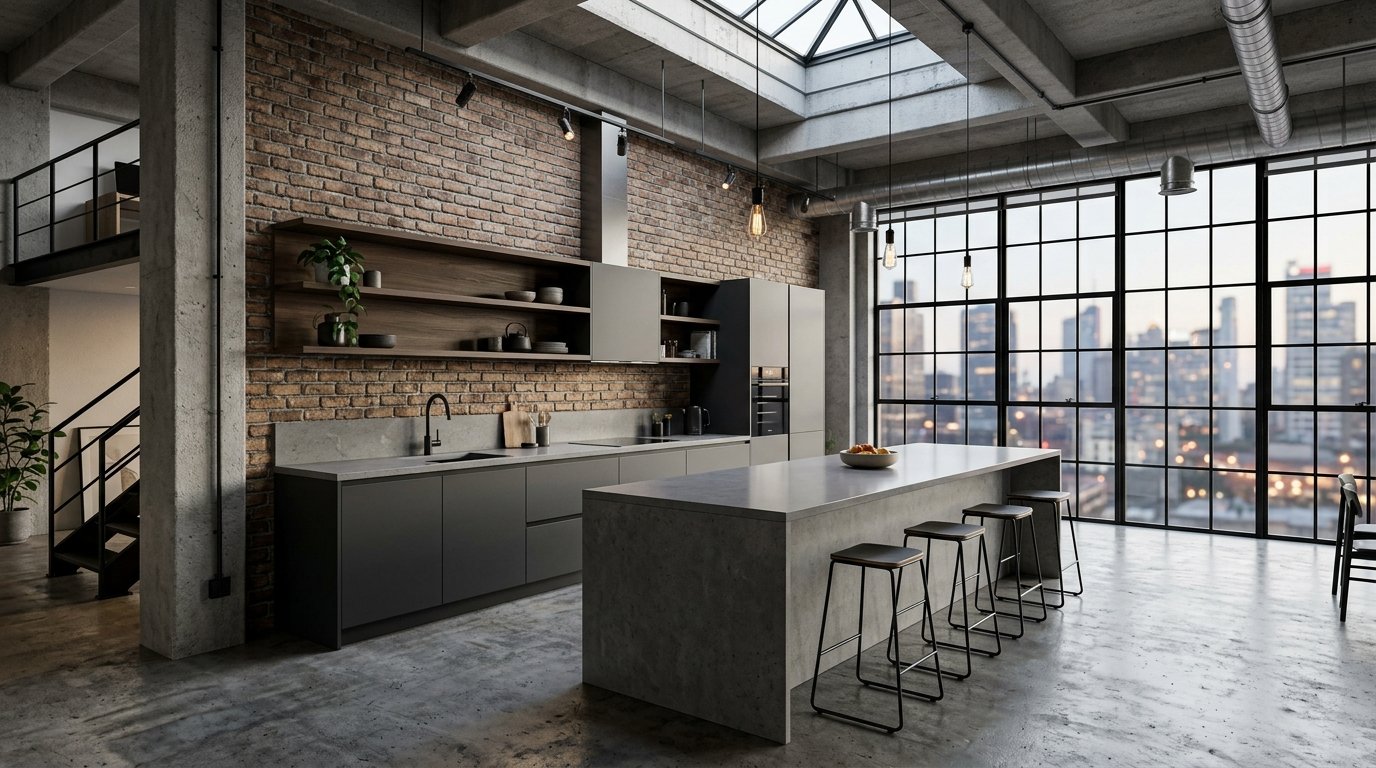
3. One-Wall Hub
In modern open-concept lofts, all appliances sit on a single wall while a long, linear island sits parallel to it. This defines the kitchen area without using actual walls. I have noticed this works exceptionally well in units under 1,000 square feet. Use a 10-foot island to house both the dishwasher and the trash pull-out. This keeps the back wall looking clean and architectural. You can typically set this up in a single weekend if using pre-assembled base units. A frequent error is not centering the island with the main wall, which makes the room look lopsided. Check your floor joists before installing a heavy stone top in this configuration.
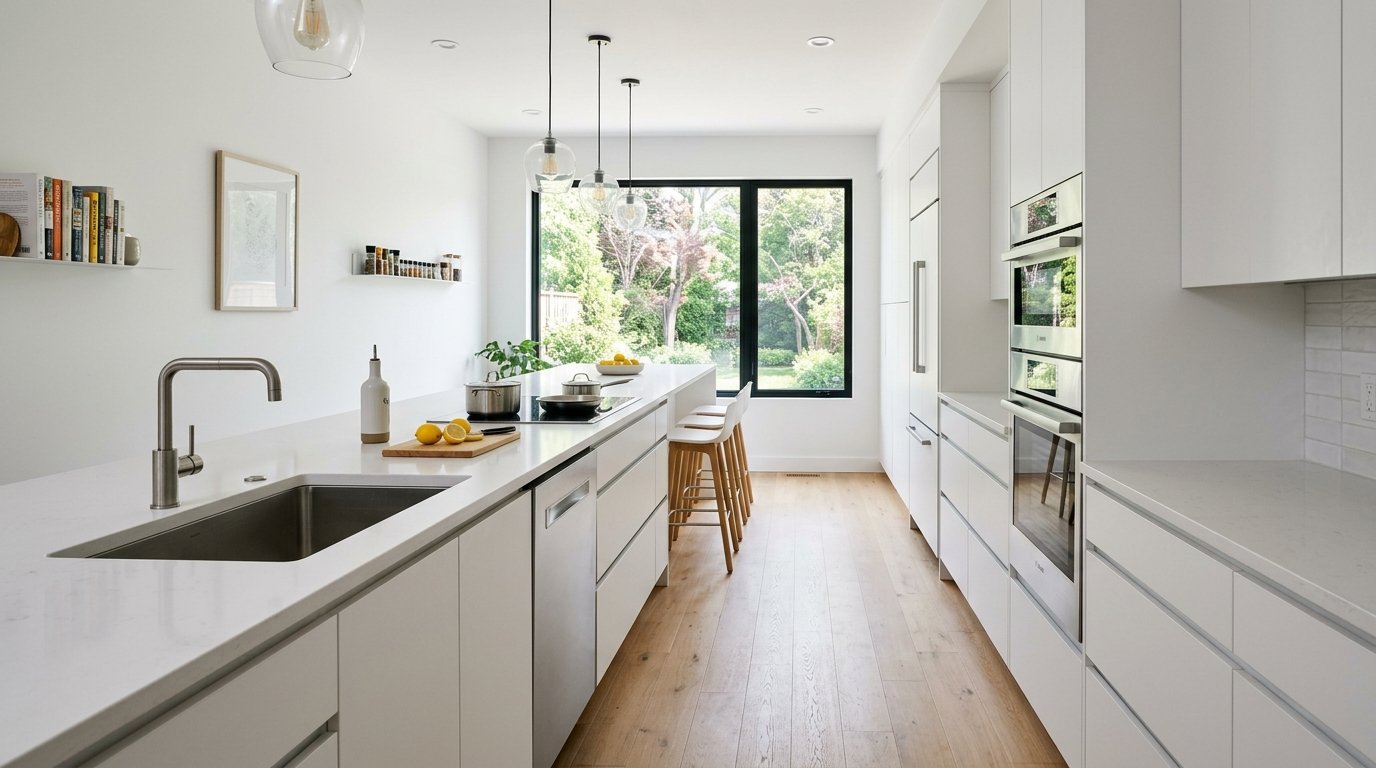
4. Galley Walkthrough
A galley setup features two parallel lines of cabinets where one line is actually a long island. This is a favorite for professional chefs because it minimizes steps between the stove and the sink. I once worked on a project where we used 48-inch walkways to allow two people to work simultaneously. Try using a waterfall edge on the island ends to give it a finished, furniture-like look. This layout is often the most budget-friendly because it eliminates expensive corner cabinets. However, it can feel like a hallway if you do not use light-colored finishes. Avoid placing the refrigerator at the very end of the long run as it blocks traffic when open.
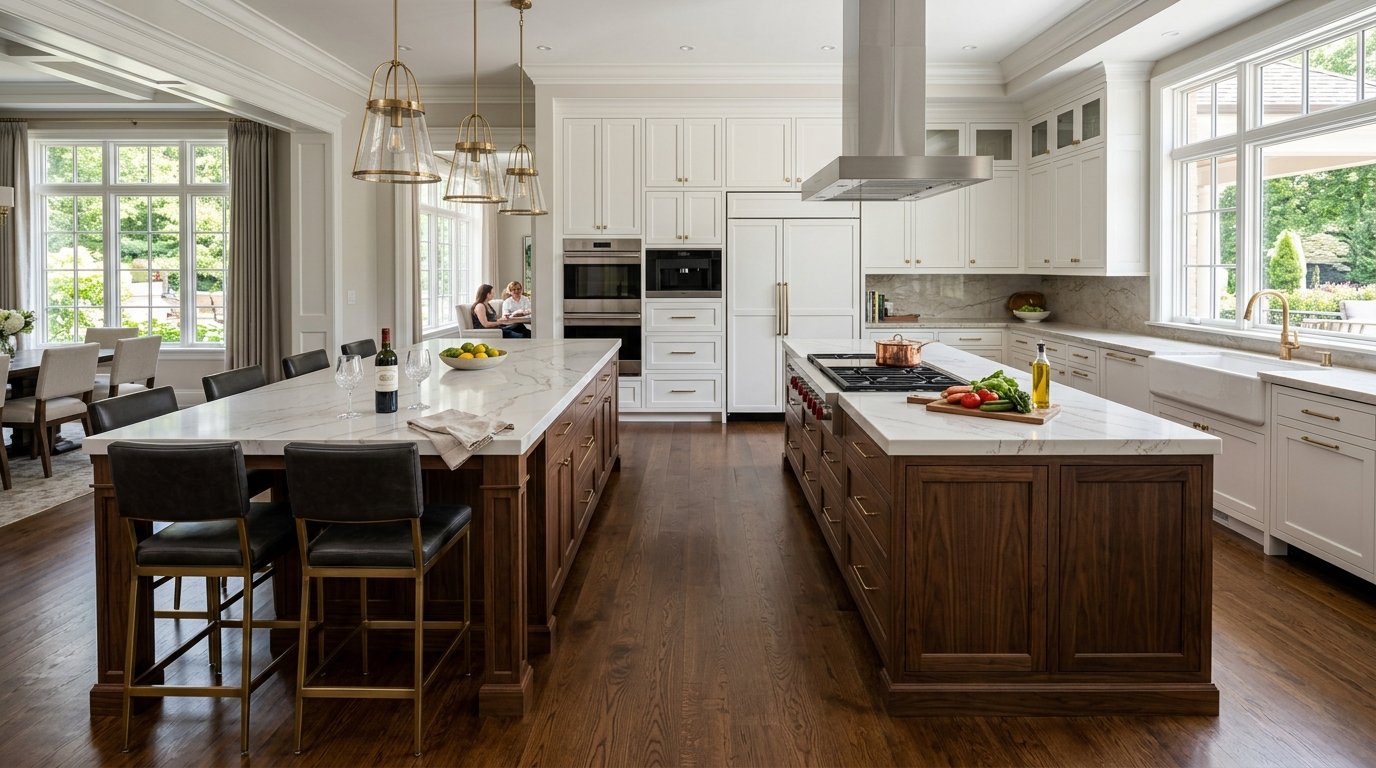
5. Double Island Luxury
For very large rooms, two separate islands provide dedicated zones for cooking and entertaining. One island handles the prep work and includes the stovetop, while the second acts as a bar for guests. I have seen this used effectively in homes over 4,000 square feet where the kitchen is the primary social spot. Use different heights for each to signal their purpose; 36 inches for prep and 42 inches for seating. This setup usually requires a budget starting at $30,000. The biggest risk is creating a “furniture showroom” look that lacks warmth. Balance the stone surfaces with upholstered bar stools or wood accents.
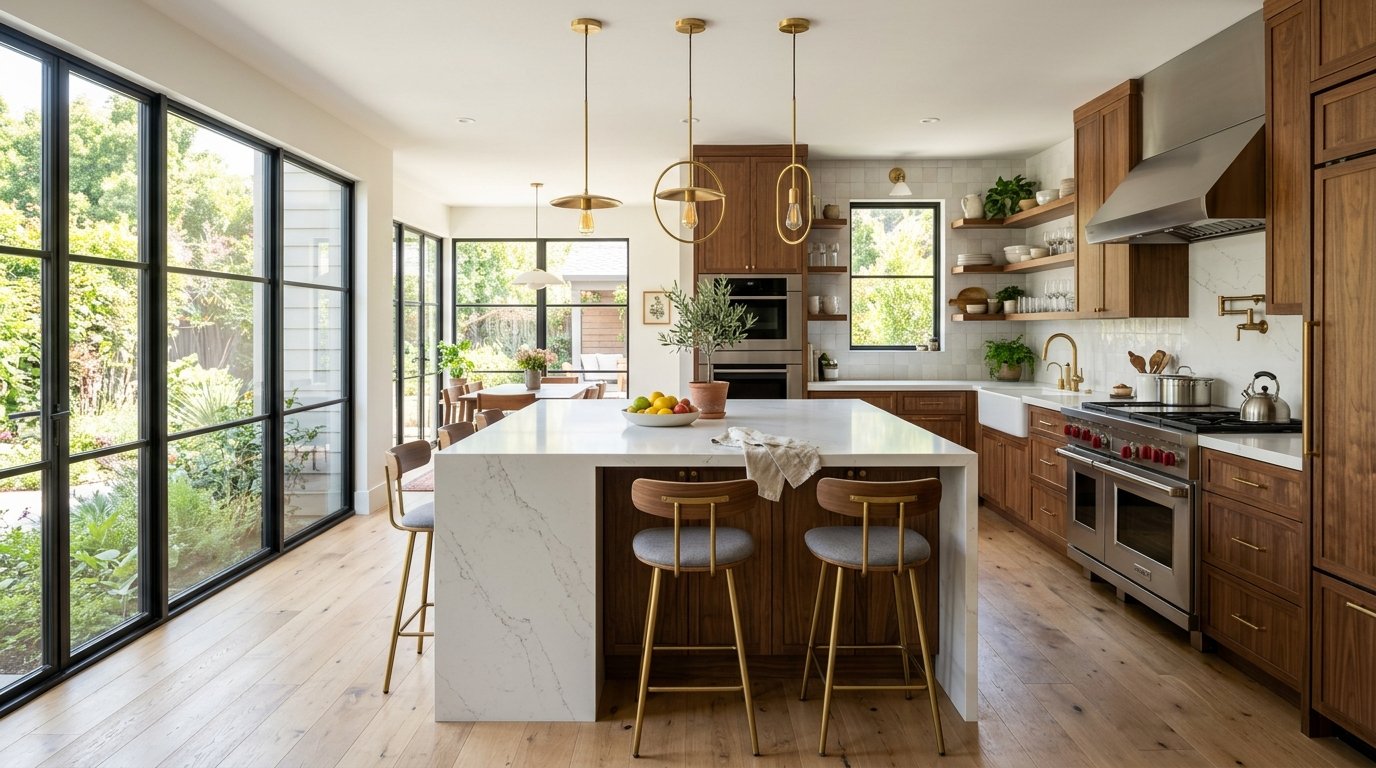
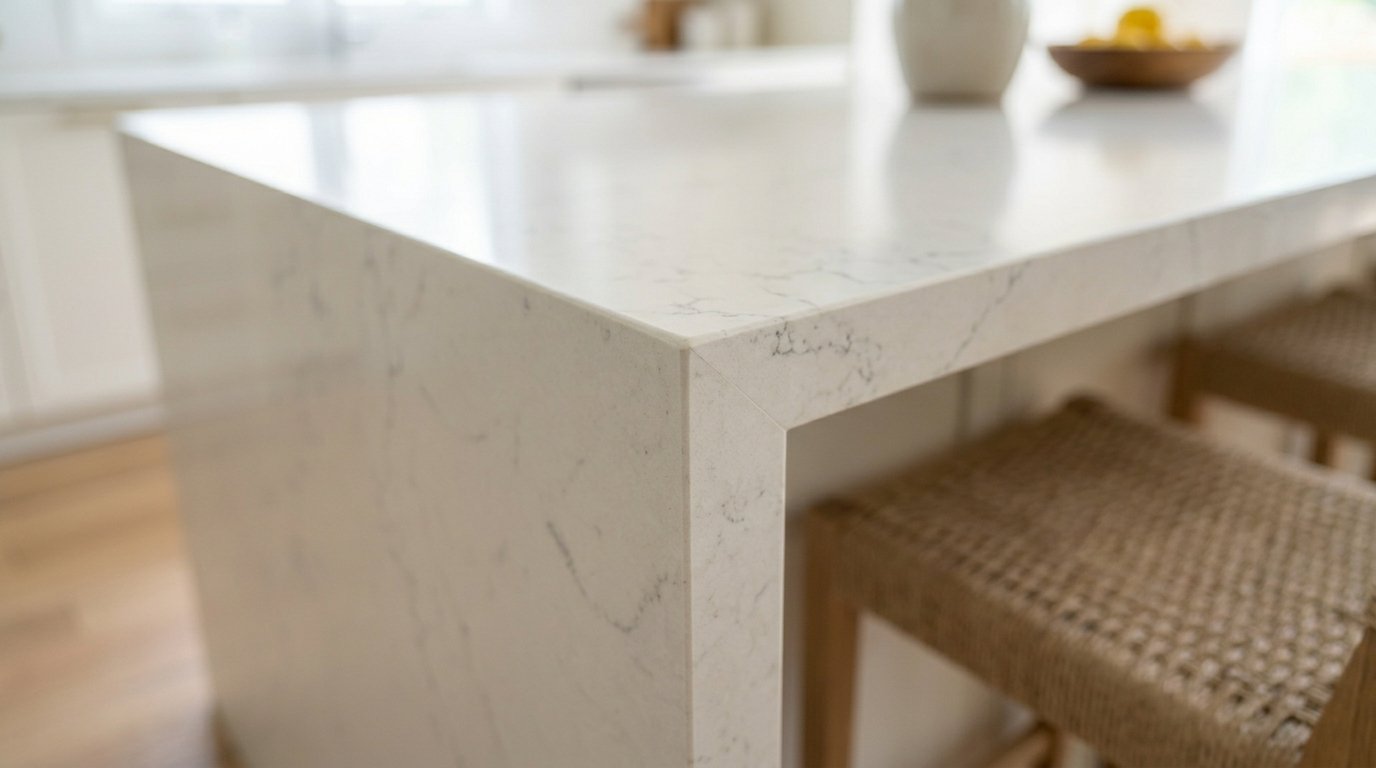
6. Waterfall Edge Focus
A waterfall design continues the countertop material down the sides of the island to the floor. This creates a sleek, continuous loop that hides the cabinet ends. I find that Calacatta quartz or Taj Mahal quartzite provides the best visual impact for this style. It costs roughly $1,000 to $2,000 more in labor and material for the extra mitering. Ensure your flooring is perfectly level before the stone is measured, or the seams will not align. A common mistake is choosing a stone with a pattern that does not “flow” over the edge. Always ask for a digital vein-matching preview from your fabricator.
7. Breakfast Bar Seating
This layout adds an 8 to 12-inch overhang on one side of the island to accommodate bar stools. It turns the prep area into a casual dining spot for busy mornings. In my experience, 12 inches is the minimum overhang for comfort so knees do not hit the cabinets. I suggest using steel brackets from Federal Brace to support the heavy stone without bulky corbels. This adds about $300 to $600 to your countertop bill. Do not cram too many stools in; allow 24 inches of width per person. I have seen many people buy four stools for a space that only comfortably fits three.
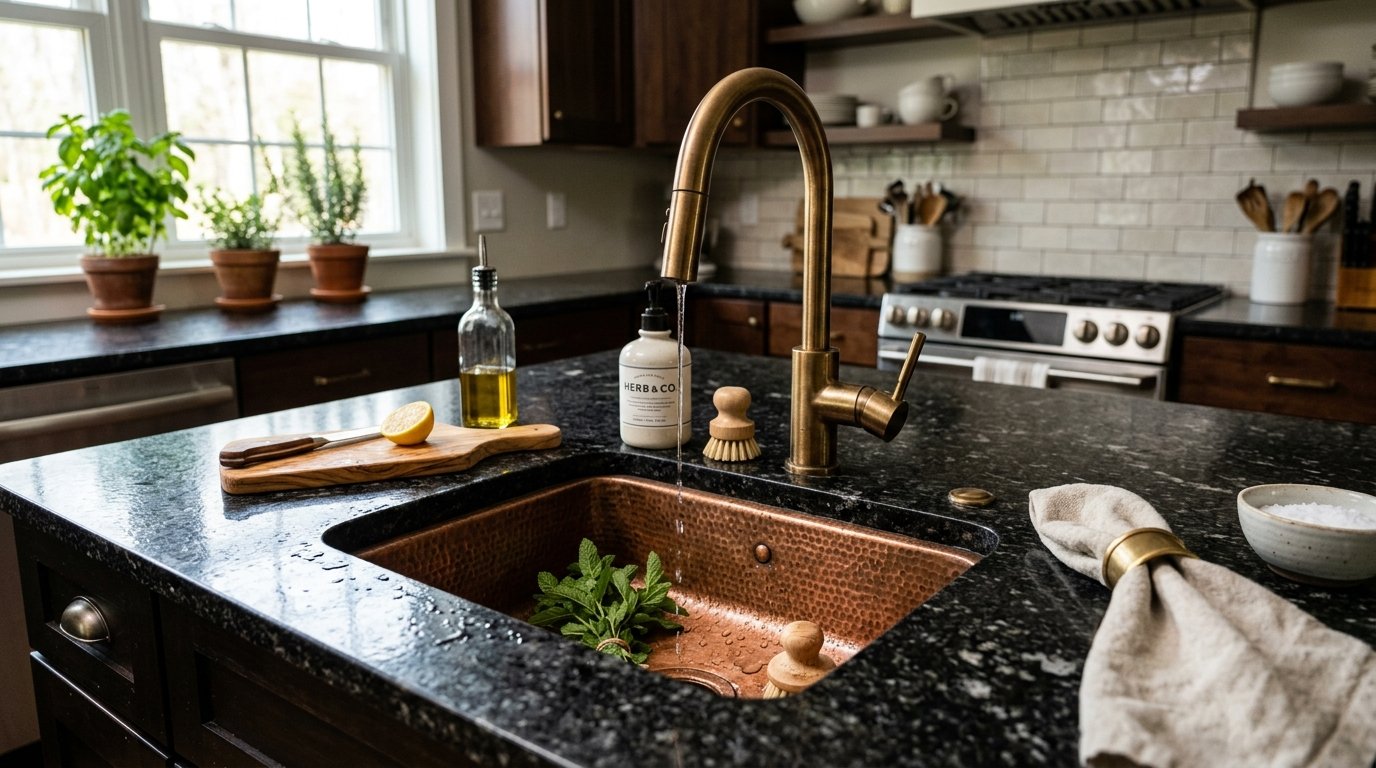
8. Prep Sink Integration
Adding a secondary sink to the island allows the main perimeter sink to be used strictly for dirty dishes. This is a game-changer for those who host large dinners or have multiple cooks. I prefer a 15-inch square drop-in sink for this purpose. You will need to account for plumbing lines running through the floor, which can cost $1,500 if you have a concrete slab. A smart move is to place the trash pull-out directly under the prep sink for easy scraps disposal. Avoid using a full-sized sink here as it eats up valuable counter space. Keep it small and functional.
9. Multi-Level Surfaces
A multi-level island features a standard 36-inch height for prep and a raised 42-inch tier for dining. This hides the mess of cooking from people sitting in the living room. I have noticed this is particularly helpful in homes with “great room” floor plans. You can use a wood top for the higher section and stone for the lower to save money. This creates a built-in backsplash for the prep area. One drawback is that the smaller surfaces are less useful for rolling out dough or large projects. It also requires more complex cabinetry construction.
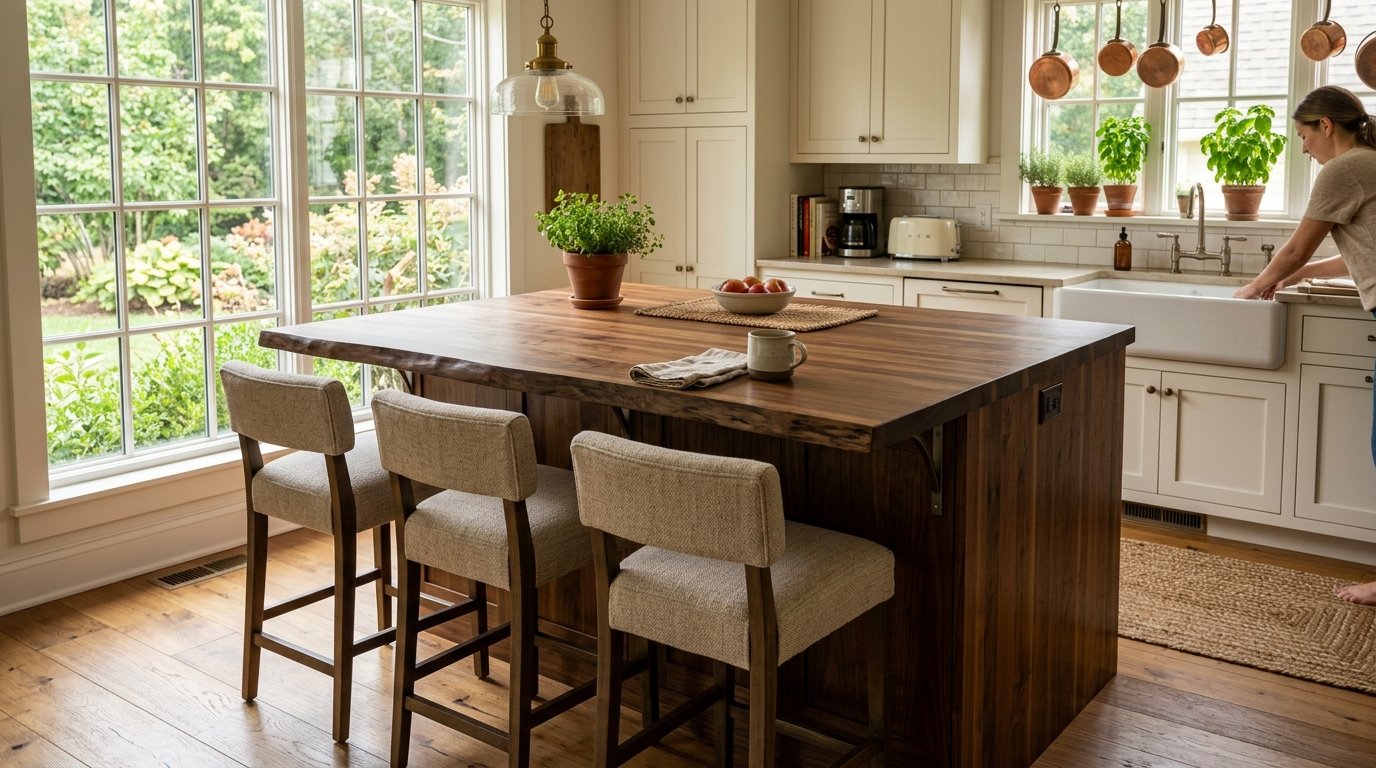
10. Compact Square Island
For square-shaped kitchens that cannot fit a long rectangle, a 3-by-3-foot island provides a central workspace. This is the “Goldilocks” solution for old bungalows with limited square footage. I often use a butcher block top here to make it feel like a piece of furniture. You can find pre-made options from retailers like Williams-Sonoma for under $1,500. This adds four usable sides for prep, which is great for baking. Ensure you still have 36 inches of clearance, even in a small room. Using a pedestal base instead of cabinets can make the room feel much larger.
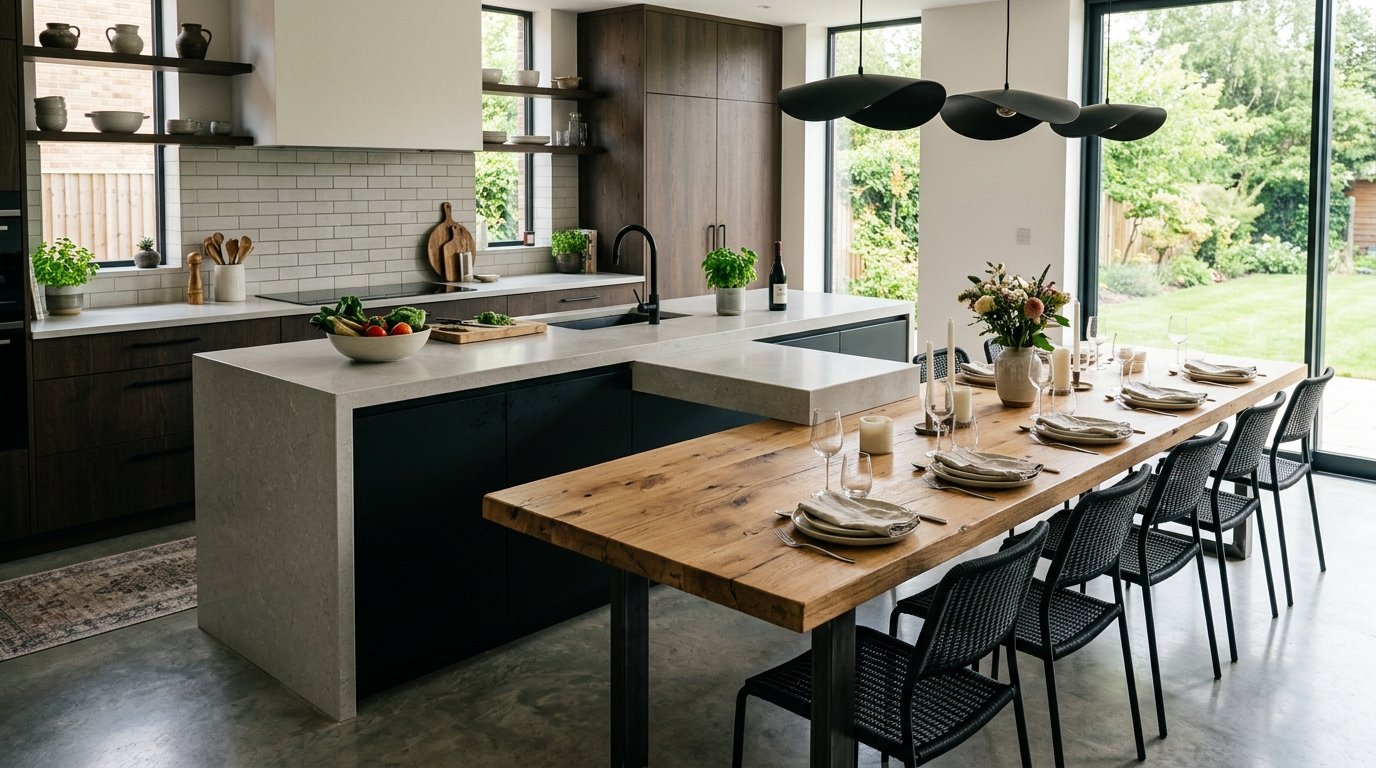
11. T-Shaped Extension
A T-shaped layout attaches a dining table perpendicular to the center of the island. This creates a massive hub for both eating and working. I have seen families use this as a homework station and a meal prep area simultaneously. It requires a room at least 15 feet wide to allow for chairs on both sides. You can use a different material, like reclaimed oak, for the table portion to create a visual break. This eliminates the need for a separate dining room table in many homes. The plumbing and electrical still stay in the main island “trunk” to keep costs manageable.
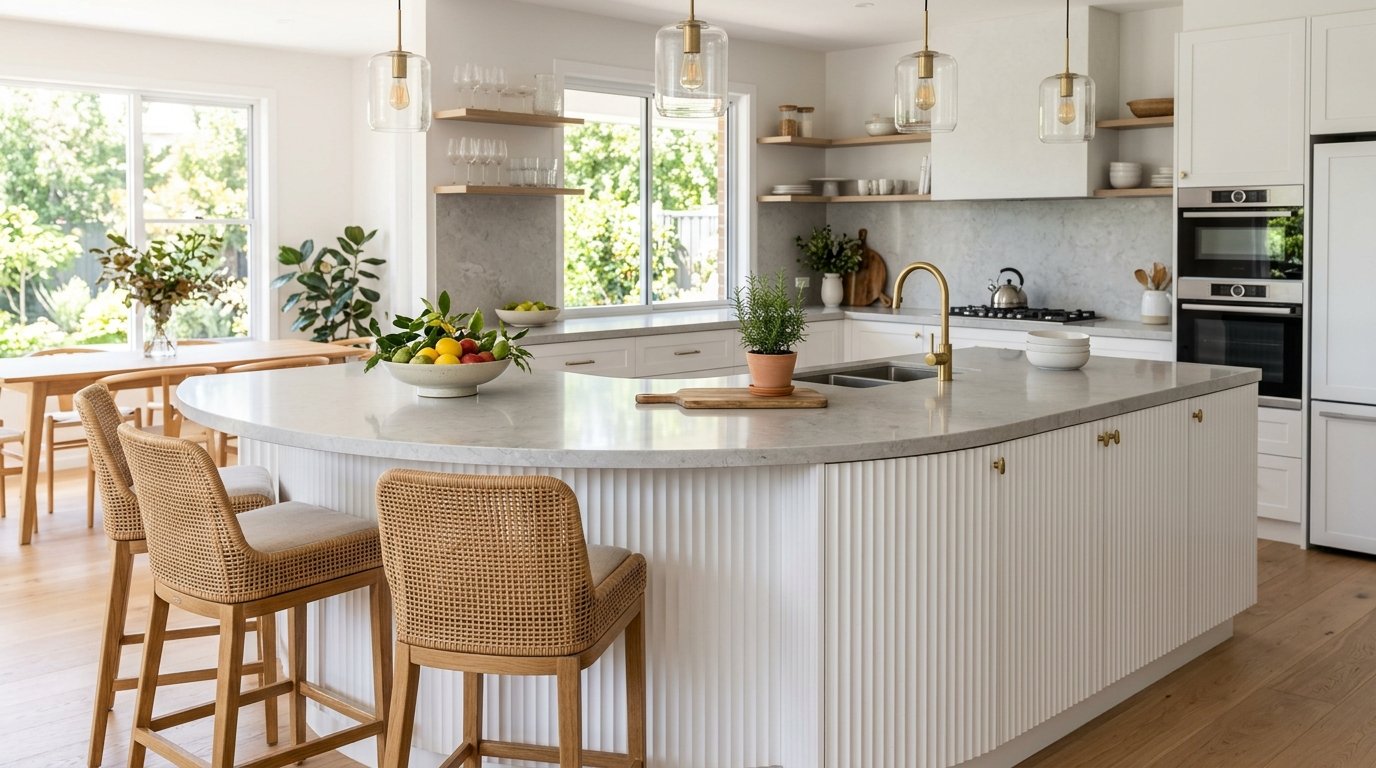
12. Curved Island Flow
Curved islands use rounded edges or a semi-circle shape to soften the lines of a room and improve traffic flow. This is excellent for homes with children because it eliminates sharp corners at head height. I find that custom cabinetry is usually required for this, which can double the price of the island base. Use small mosaic tiles on the back of the curve for a textured look. It works best in large, open spaces where the island is the focal point. Be aware that cutting stone in a curve is more expensive and results in more wasted material.
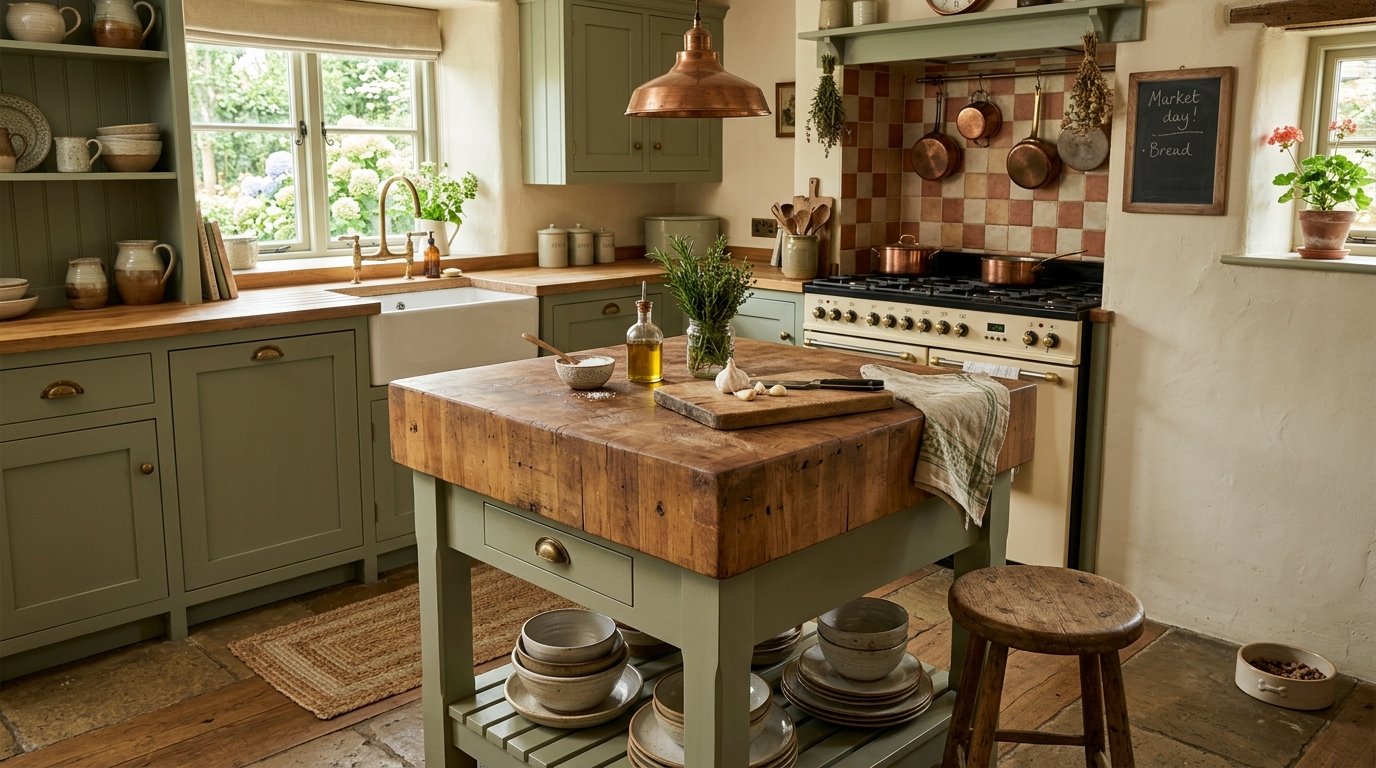
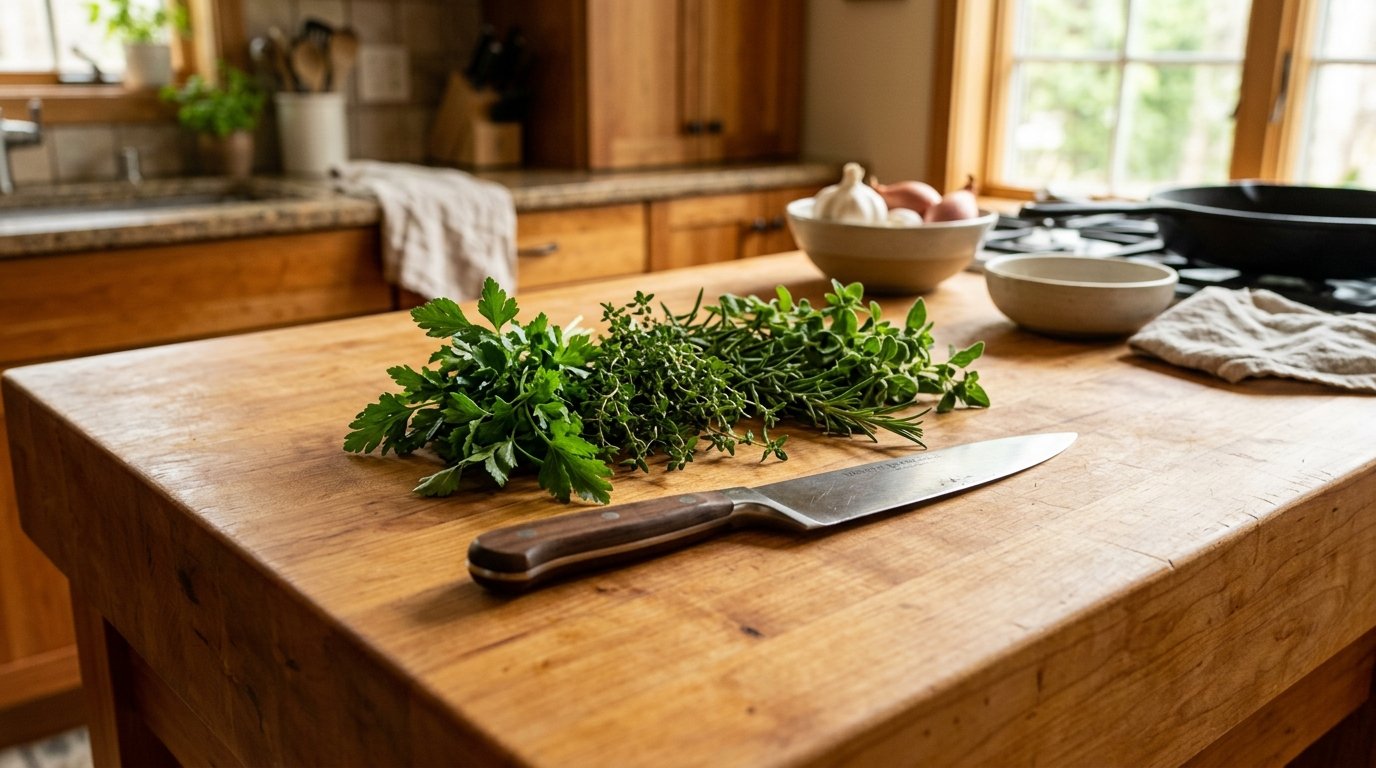
13. Butcher Block Station
This layout uses a thick wood top instead of stone on the island, turning the entire surface into a cutting board. I have observed that end-grain maple is the best choice for longevity and knife health. You must oil the wood monthly with food-grade mineral oil to prevent cracking. This is a great way to save $2,000 compared to a high-end marble slab. It provides a warm, organic feel that balances cold stainless steel appliances. Do not install a sink in a butcher block top unless you are prepared for constant water maintenance around the rim.
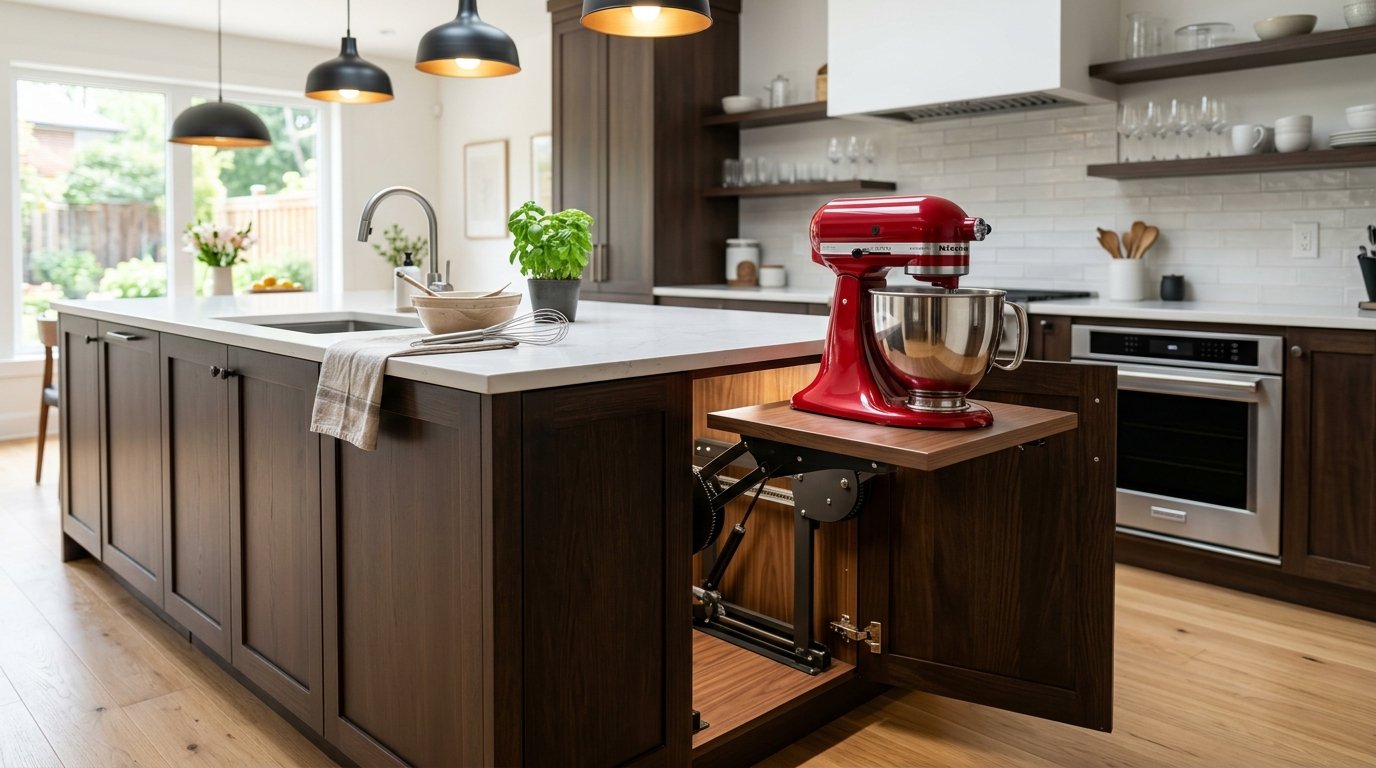
14. Hidden Appliance Garage
This setup incorporates cabinets on the island designed to hide small appliances like mixers and blenders. I find that “lift-up” hardware from Blum allows heavy stand mixers to stay plugged in and pop up when needed. This keeps your main counters clear of clutter. It is a specific layout choice for those who value a minimalist aesthetic. Expect to spend an extra $500 per lift mechanism. This requires careful electrical planning to ensure outlets are inside the cabinets. Make sure the cabinets are deep enough (24 inches) to house your largest appliance.
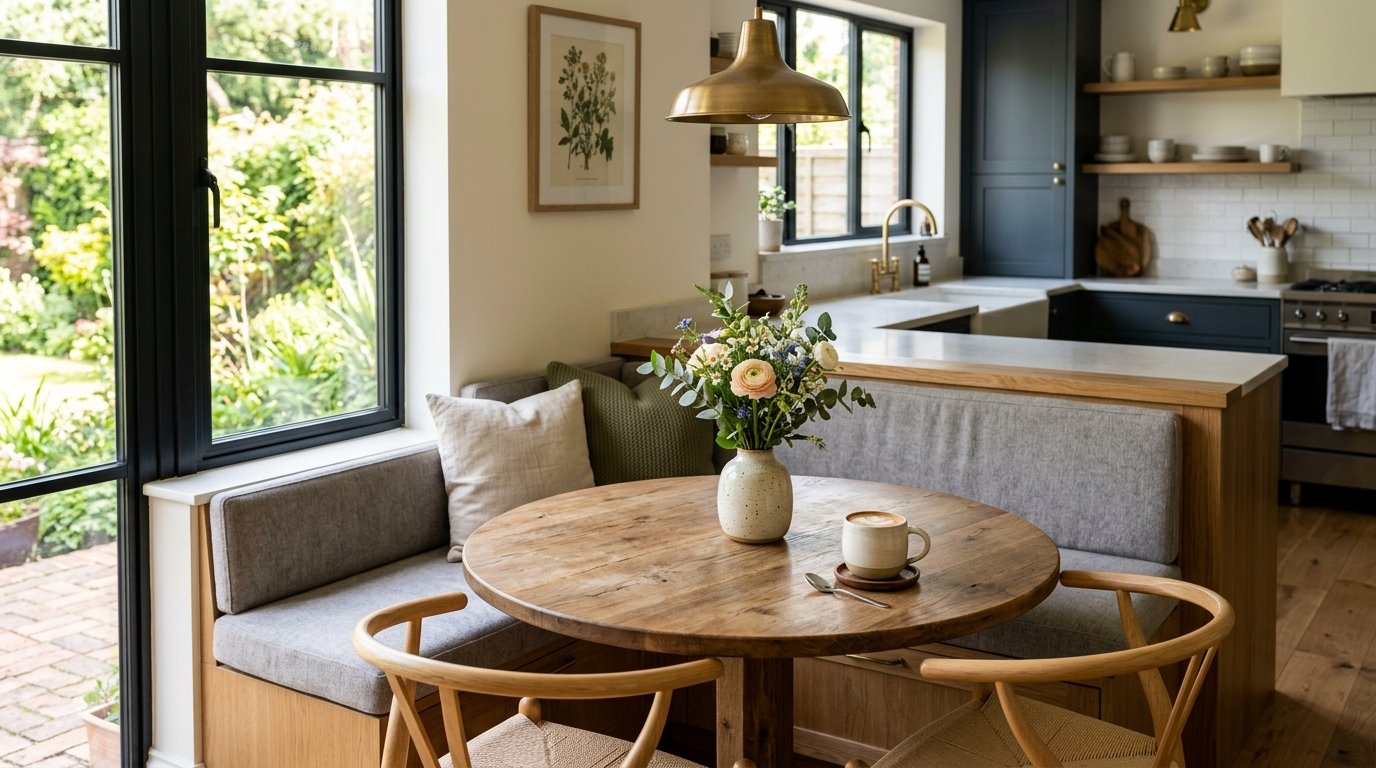
15. Overhang Dining Nook
Instead of bar stools, one end of the island is designed with a deep overhang that acts as a built-in cafe table. I have seen this work well with a 30-inch standard table height on one end. It is more accessible for elderly family members or small children who struggle with high stools. Use a contrasting leg style, like a black iron post, to support the table end. This creates two distinct zones in one piece of furniture. One mistake is not providing enough legroom; you need at least 18 inches of depth for table-height seating.
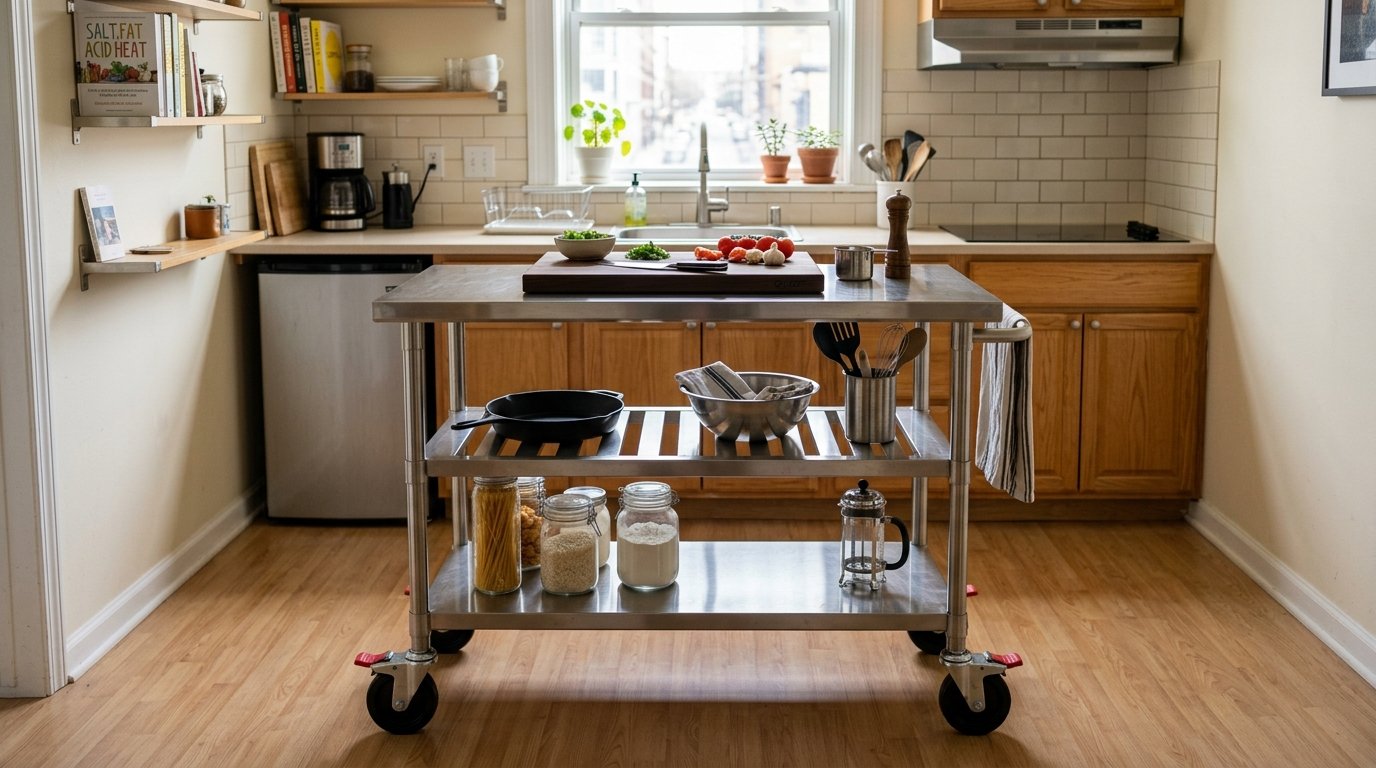
16. Mobile Rolling Cart
In very tight kitchens, a heavy-duty rolling island provides flexibility. You can move it against a wall when hosting large groups or center it when cooking. I suggest models with locking casters and a stainless steel top for durability. I’ve seen great versions at restaurant supply stores for under $500. This is the perfect solution for renters who cannot make permanent changes. While it lacks built-in power or water, it provides the extra 6 square feet of prep space most people lack. Always check the weight capacity if you plan to store a heavy Dutch oven on the bottom shelf.
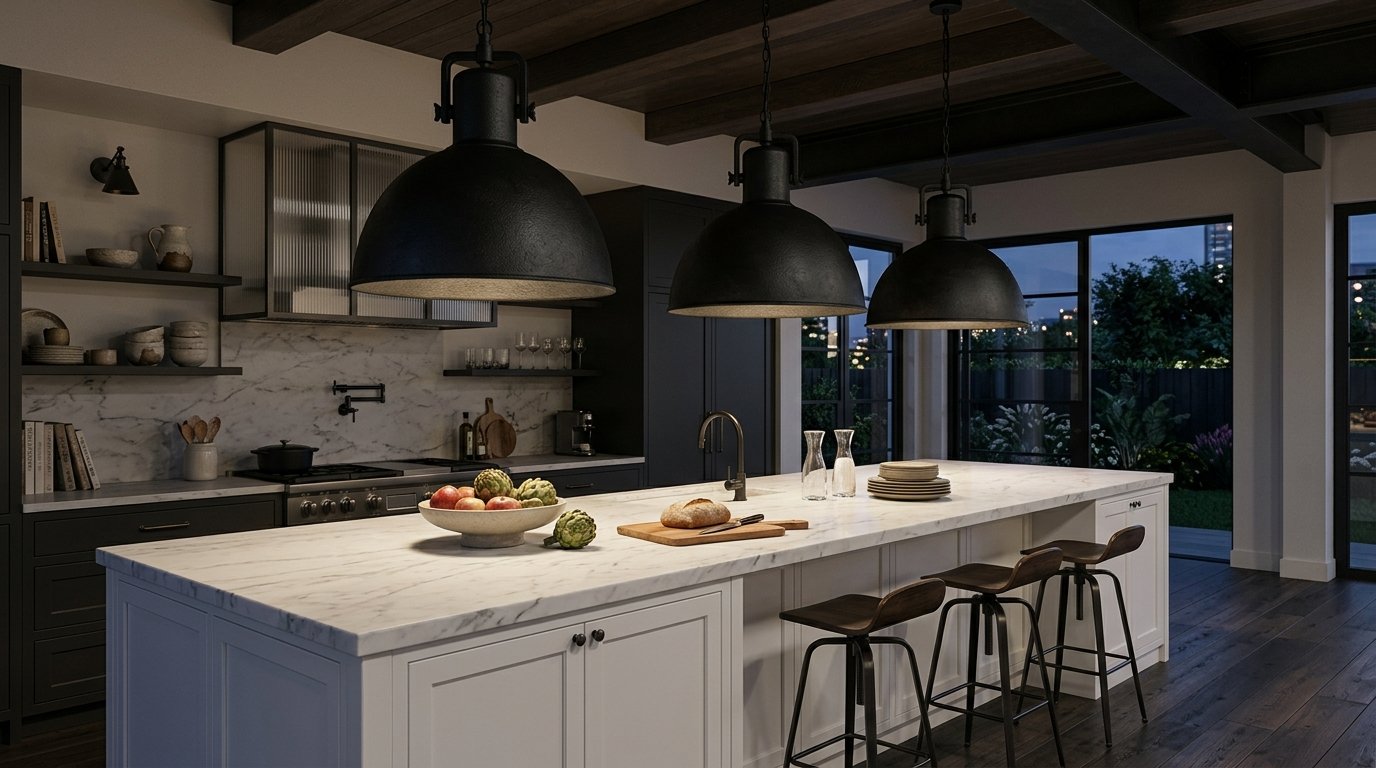
17. Pendant Lighting Anchor
This layout focuses on the island as the visual center by using three large pendant lights. I find that the bottom of the lights should hang 30 to 36 inches above the counter. This defines the space without physical barriers. Brands like Rejuvenation offer high-quality fixtures that can transform a basic island into a high-end feature. This requires an electrician to run multiple boxes in the ceiling, usually costing $400 to $800. A common error is choosing lights that are too small for the island’s scale. Aim for fixtures that are at least 1/3 the width of the counter.
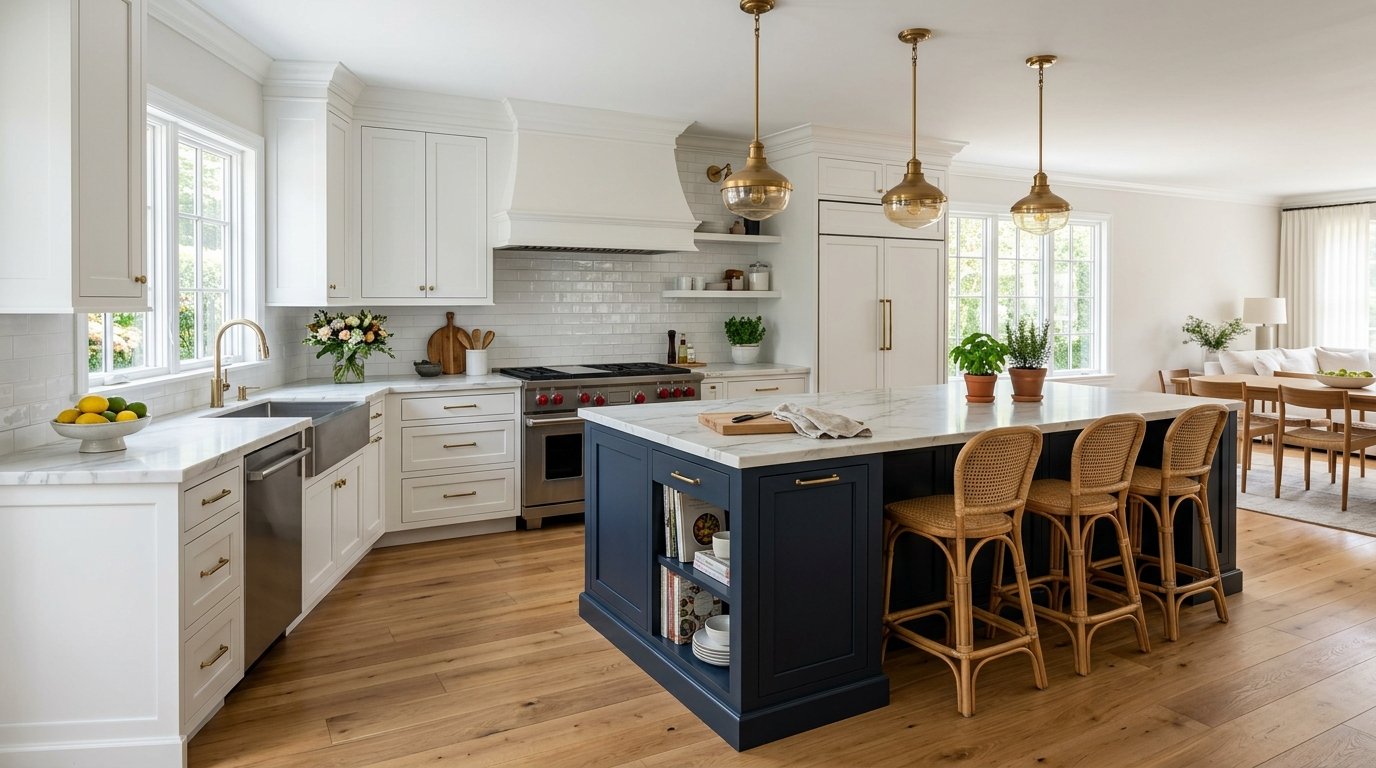
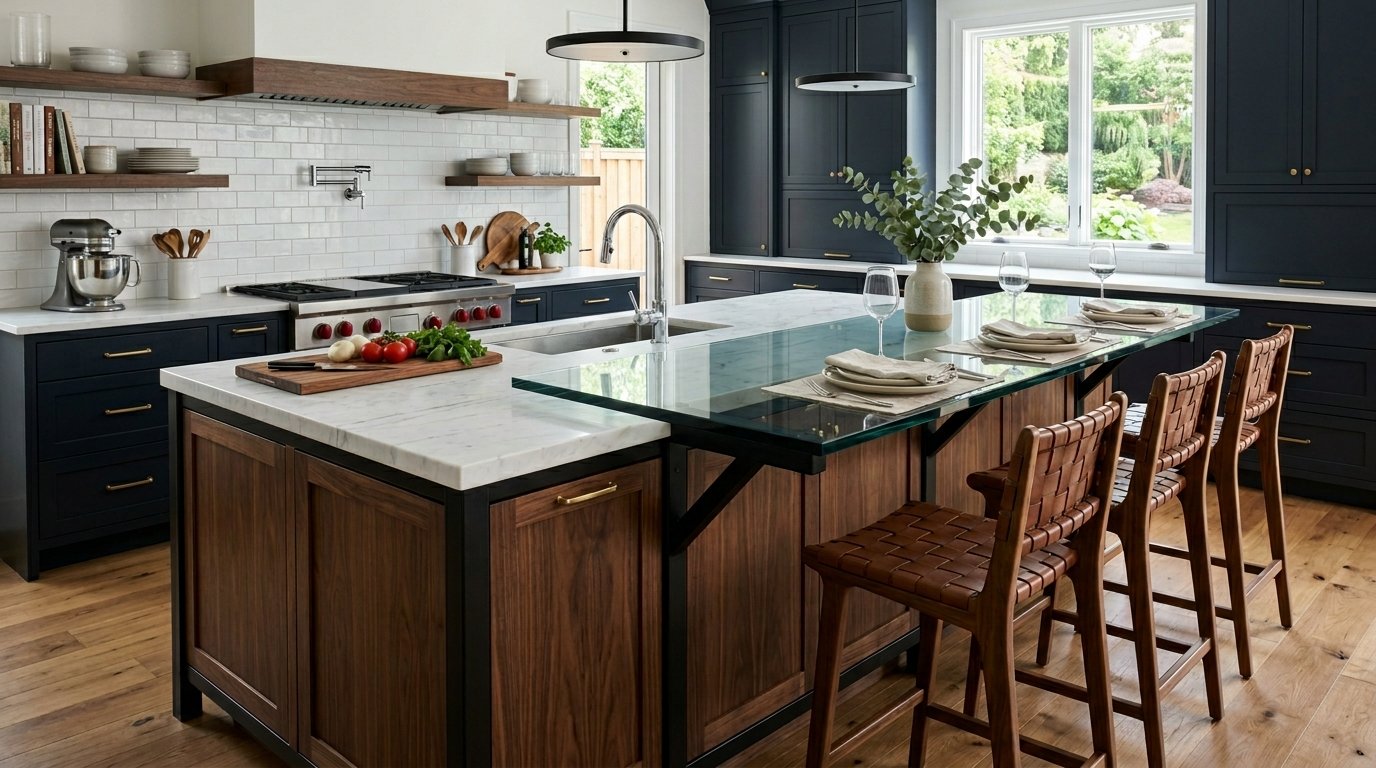
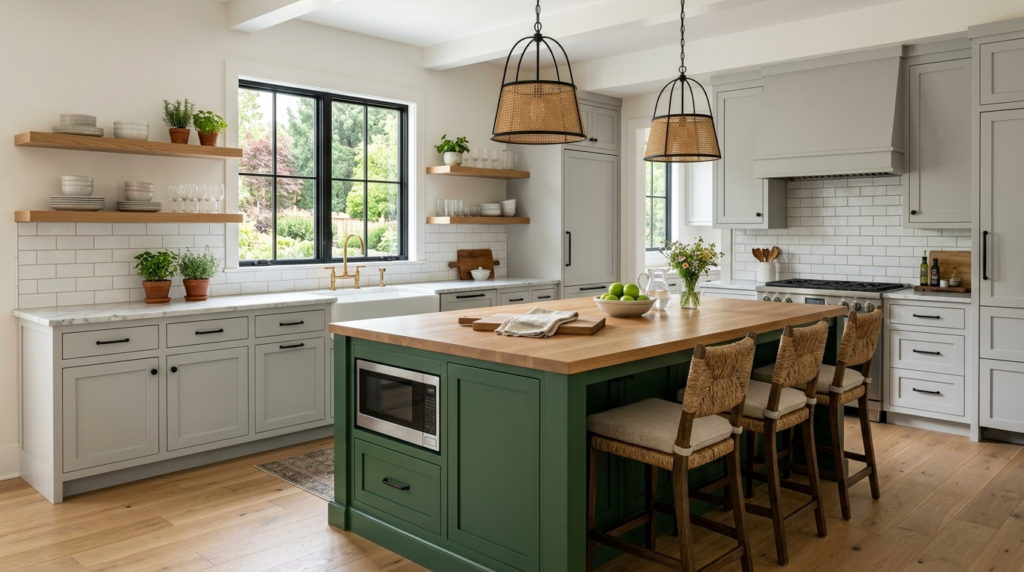
18. Contrasting Cabinet Colors
Using a different color for the island cabinets than the perimeter cabinets makes the island pop. I often see “Navy Blue” islands paired with “Crisp White” perimeter walls. This adds depth to the room without needing expensive architectural changes. It is a simple way to make a builder-grade kitchen feel custom. Use the same hardware across all cabinets to keep the look cohesive. This does not add any extra cost to the project if you are already painting or buying new. I’ve noticed that dark islands hide scuff marks from shoes much better than light ones.
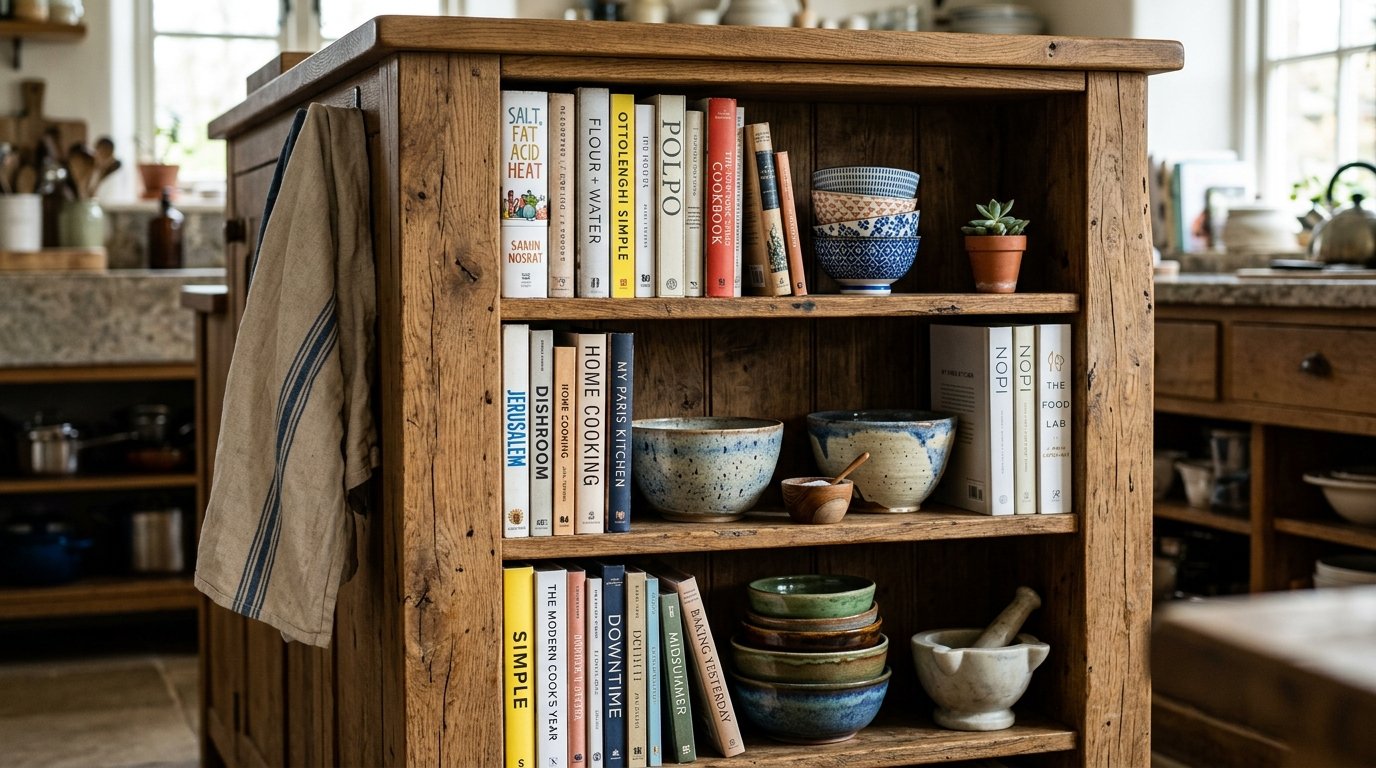
19. Open Shelving Endcap
Adding open shelves to the end of an island provides a spot for cookbooks and decorative bowls. This breaks up the “blocky” look of solid cabinetry. I find that 12-inch deep shelves are perfect for standard hardback books. It makes the kitchen feel more like a lived-in library or a cozy cafe. This is a great DIY project; you can add shelving to an existing island using matching plywood and trim. The downside is that these shelves collect dust and require frequent cleaning. Keep only your most-used items here to ensure they stay fresh.
20. Integrated Cooktop Layout
Placing the stove on the island allows the cook to face the room while preparing meals. This is the ultimate social layout for people who love to entertain while they sauté. I suggest using an induction cooktop for a flush, nearly invisible look. You must install a downdraft vent or a powerful ceiling hood, which adds $2,000 to $4,000 to the budget. I have seen people skip the venting, only to have their smoke alarms go off every time they sear a steak. Ensure there is at least 12 inches of stone on either side of the burners for safety.
21. Narrow Profile Solution
For “corridor” style kitchens, a narrow island (only 18 to 24 inches wide) provides a landing spot without blocking the path. I find that using 12-inch deep wall cabinets as the base units is a smart way to achieve this. It gives you a surface for a grocery bag or a cutting board without the bulk. You can often fit this into a room that is only 10 feet wide. It adds valuable storage for spices and small items. Just be aware that you cannot fit a standard sink or dishwasher in a base this shallow. Use it strictly for storage and extra counter space.
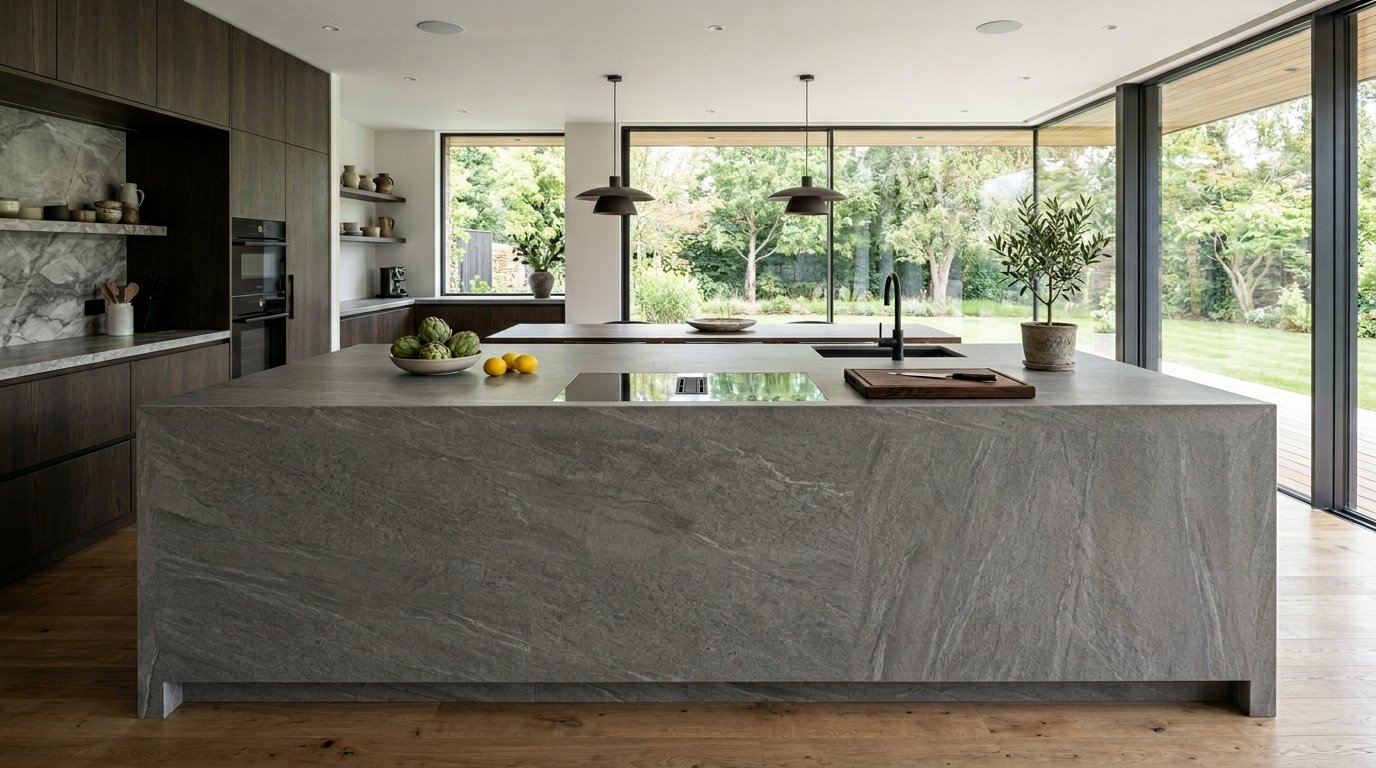
22. Wrapped Stone Base
In this high-end design, the cabinet bases themselves are clad in thin porcelain or stone slabs. This creates a monolithic, sculptural look that is common in European design. I have seen this used with Dekton surfaces because they are incredibly thin and durable. This is an advanced installation that requires specialized contractors. It can cost upwards of $20,000 just for the island exterior. The result is a kitchen that looks like a piece of modern art. A practical tip is to use “touch-to-open” latches so you don’t need handles that break the clean stone lines.
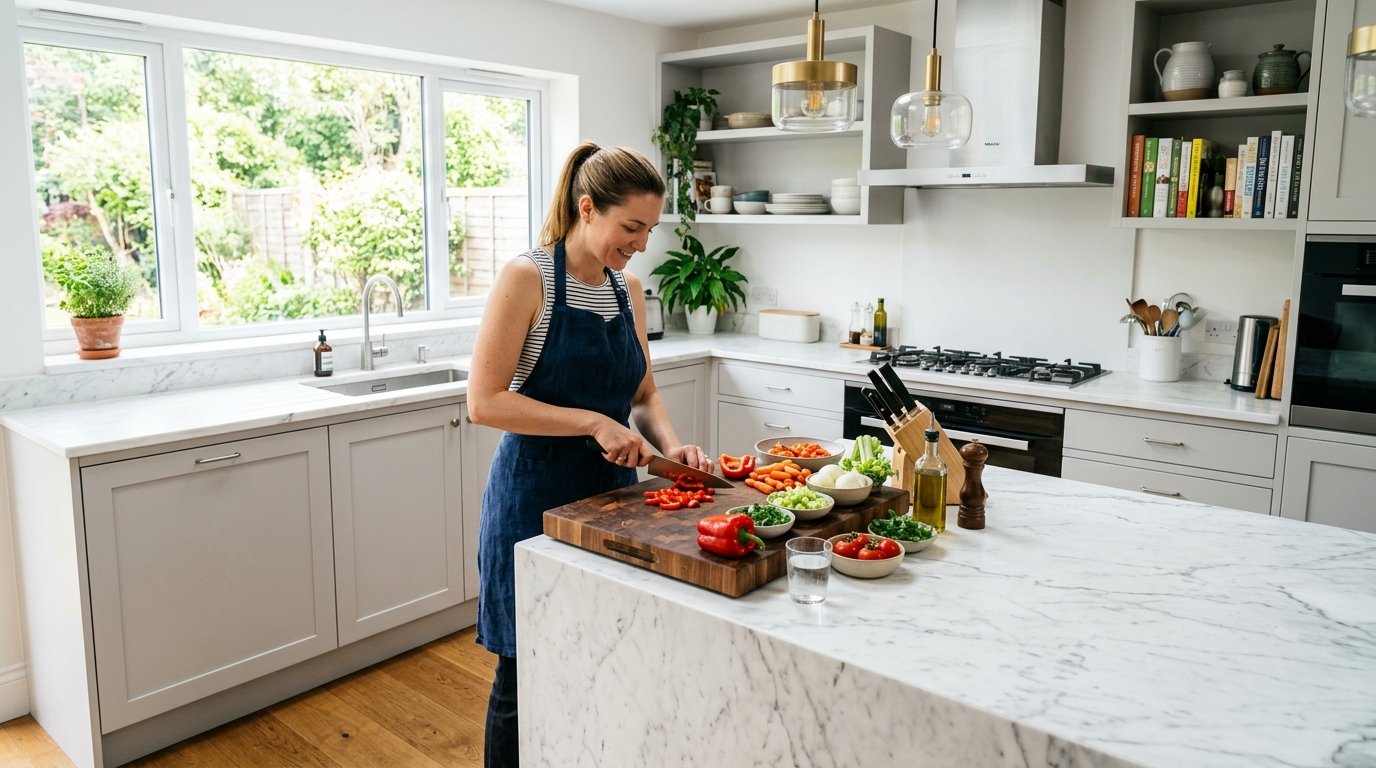
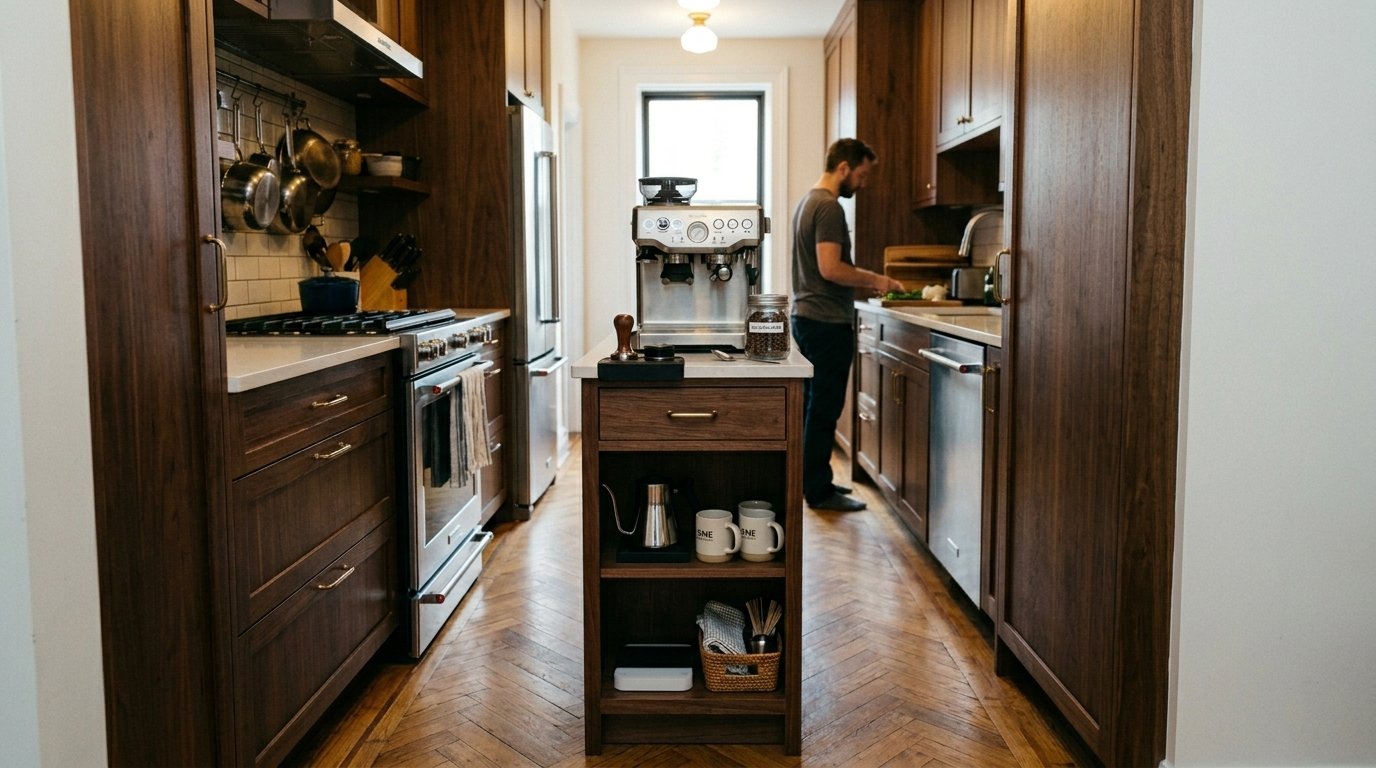
23. Zone-Based Prep Area
This layout treats the island as a specialized station for one task, such as baking or coffee. I’ve seen enthusiasts install a built-in Miele espresso machine and a small cooling drawer for milk right in the island. This keeps the “coffee traffic” out of the main cooking triangle. It works best if you have a secondary, larger island or a lot of perimeter space. You can tailor the height specifically to the task—lower for rolling dough or higher for a bar. This requires very specific electrical and plumbing planning but results in a highly personalized home.

Comparison of Island Surface Materials
| Material | Avg. Cost (per sq ft) | Durability | Best Use Case |
| Quartz | $75 – $150 | High | Daily heavy cooking, families |
| Granite | $60 – $120 | High | Heat resistance near stoves |
| Butcher Block | $40 – $80 | Medium | Baking and prep-heavy zones |
| Marble | $100 – $250 | Low | Aesthetics and pastry making |
| Laminate | $20 – $50 | Low | Budget-friendly refreshes |
| Stainless Steel | $80 – $150 | Very High | Professional/Industrial looks |
Frequently Asked Questions
What is the minimum walkway width for an island?
The industry standard for a comfortable walkway is 42 inches for a single-cook kitchen and 48 inches for a space where two people often work. I have seen people try to squeeze by with 36 inches, but it often leads to bruised hips and frustration when the dishwasher or oven door is open. If you have a tight space, consider a narrower island to preserve these clearances.
How much does it cost to add an island with plumbing?
Adding a sink or dishwasher to an island usually increases the cost by $2,000 to $5,000. This covers the licensed plumber’s labor, the piping, and potentially cutting into your subfloor or slab. In my experience, if you are on a crawlspace, the cost is lower than if you are on a concrete slab. Always get a plumbing quote before you buy your cabinets.
Can I add an island to a small kitchen?
Yes, but you must be strategic. Look for “mobile” options or islands that are only 24 inches deep. I find that a 4-foot long by 2-foot wide island can fit in many rooms that people assume are too small. The key is maintaining that 36 to 42-inch “dead space” around it so you can still move freely.
Does an island add value to a home?
A functional kitchen is the number one driver of home resale value. Adding an island can provide a 60% to 80% return on investment because it addresses the two biggest complaints of homebuyers: lack of counter space and lack of storage. I have noticed that homes with islands sell faster than those with “open” but empty center floors.
Should the island match the rest of the cabinets?
It does not have to. In fact, a contrasting island is a major design trend that adds visual interest. I suggest keeping the countertop the same if you change the cabinet color, or vice versa. This creates a “coordinated but not matching” look that feels more high-end and intentional.
What height should kitchen island seating be?
Standard island height is 36 inches, which requires counter-height stools (24-26 inch seat height). If you have a raised bar at 42 inches, you need bar-height stools (30 inch seat height). I’ve seen many people buy the wrong stools online, so measure your counter height twice before ordering.
Is a kitchen island with a stove a good idea?
It is great for socializing, but it requires a more expensive venting solution. A standard wall hood will not work. You will need an island hood mounted to the ceiling or a downdraft vent integrated into the cooktop. I find that induction is the safest choice for islands to prevent accidental burns when people are sitting nearby.
How much overhang do I need for legs?
For a standard 36-inch high counter, you need a 12-inch overhang to sit comfortably. For a 42-inch bar, you can get away with 8 to 10 inches. If you go deeper than 12 inches, you will need decorative legs or hidden steel brackets to support the weight of the stone so it doesn’t crack.
Can I put a microwave in the island?
This is a very popular way to save counter space. I recommend a “microwave drawer” like those from Sharp, which pull out at waist height. This is much safer than a standard microwave tucked into a lower cabinet where you have to bend down to see the buttons. It usually requires a dedicated 20-amp circuit.
What are the best lights for an island?
Pendant lights are the standard choice. I suggest using an odd number—usually three for a standard island and two for a very small one. Space them evenly so the light spreads across the whole work surface. I’ve found that LED bulbs with a “warm white” temperature (2700K to 3000K) make food look the most appetizing.
Is butcher block hard to maintain?
It requires more work than stone, but it is not impossible. You need to apply mineral oil once a month. If it gets scratched or stained, you can simply sand it down and re-oil it, which you cannot do with quartz or granite. I find it’s the only surface that actually looks better as it ages and gets a “patina.”
How do I add power to my island?
Building codes in most areas require at least one electrical outlet on an island. You can hide these on the ends of the cabinets or use “pop-up” outlets that sit flush in the countertop. This is essential for using blenders or charging phones. Expect an electrician to charge $300 to $600 for this addition.
Motivational Conclusion
I have seen how a well-planned kitchen layout with island turns a stressful cooking environment into the heart of the home. By choosing a setup that matches your specific movement patterns, you gain more than just storage; you gain a better daily rhythm. I’ve seen how small changes like these can completely transform a space. Start by measuring your clearances today and pick one of these 23 ideas that fits your footprint. Save this post on Pinterest so you can reference these dimensions when you start your remodel. Share this guide with anyone currently fighting for counter space in a cramped kitchen.