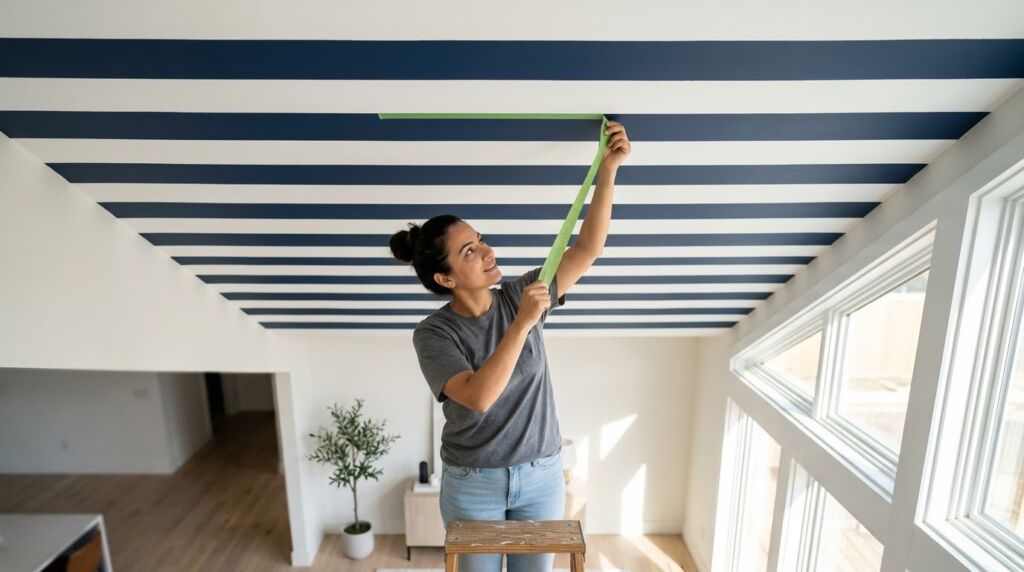
Striped ceiling ideas transform a boring room into a bold statement. I remember my first attempt at a patterned ceiling. I lived in a tiny rental with grey walls. The space felt cramped and dull. I decided to paint thick navy stripes across the ceiling. My friends thought I was crazy. They said it would make the room feel smaller. They were wrong. The stripes drew the eye upward. The room felt taller and much more alive. That project started my obsession with the funhaus look. This style uses bright colors and bold patterns. It rejects the idea that ceilings must be white. You can use painted stripes on ceiling surfaces to create energy. It works in hallways and bedrooms. It even works in kitchens. This guide covers everything I learned from years of painting and testing designs. You will see how to pick colors. You will learn the best tools for the job. We will look at 15 specific ways to use striped ceiling paint for your home.
Executive Summary
This guide shows you how to use striped ceiling ideas to change your home. You will find 15 distinct ways to apply patterns. We look at the yellow ceiling hallway trend. We cover the wall paint half and half technique. I share my personal failures with tape and paint bleed. You will get a list of real tools like FrogTape and Bosch laser levels. We discuss costs and time. Most projects take a weekend. They cost less than 150 dollars. You will find tips for small spaces and high ceilings. I explain why a colorful ceiling is the best way to add personality. We address common fears about bold paint. This is the only resource you need for your funhaus project.
1. The Classic Circus Stripe
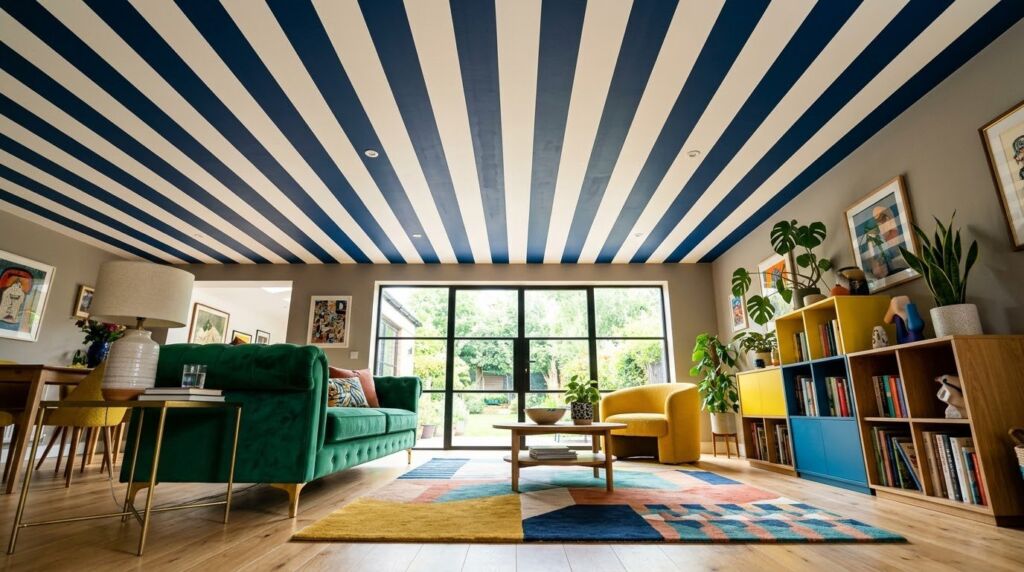
The circus stripe is the most popular of all striped ceiling ideas. It uses two colors of equal width. I love using red and white for a vintage vibe. It makes a room feel like a celebration. You should use a laser level for this. I once tried to eye it in a guest bath. The stripes ended up crooked. It looked like a funhouse mirror gone wrong. Use a Bosch GLL25 for straight lines. This patterned ceiling works best in rooms with high ceilings. It creates a rhythm that moves through the space.
You must measure the total width of your ceiling first. Divide that by your desired stripe width. This ensures you do not end up with a tiny sliver at one wall. Aim for stripes between 8 and 12 inches wide. Wider stripes feel modern. Thinner stripes feel busy. I prefer the 10 inch mark for most standard rooms.
2. The Subtle Tone on Tone
Not every colorful ceiling needs to be loud. You can use two shades of the same color. I tried this in a nursery using soft blue. One stripe was matte. The other was semi gloss. The result was a patterned ceiling painted with light. It only shows up when the sun hits it. This is a great way to start if you are nervous. It adds depth without being too much.
Use Benjamin Moore Aura paint for this. It has great hide and rich pigments. The semi gloss stripe will reflect the floor lamp at night. It creates a soft glow. This is a sophisticated take on the funhaus style. It proves that striped ceiling paint can be elegant too.
3. The Painted Hallway Ceiling Runner
+
A painted hallway ceiling acts like a rug for your head. Most people leave hallways white. That is a mistake. Hallways are perfect for a yellow ceiling hallway design. I once painted a dark corridor with bright canary stripes. It felt like walking through sunshine. It turned a transition space into a destination.
Start the stripes at the door frame. Run them all the way to the end of the hall. This leads the eye forward. It makes a short hallway feel much longer. Use a high quality brush like a Purdy Clearcut. It helps you get sharp edges near the crown molding. A colorful ceiling in a hall is a low risk way to try this trend.
4. The Wall Paint Half And Half Wrap
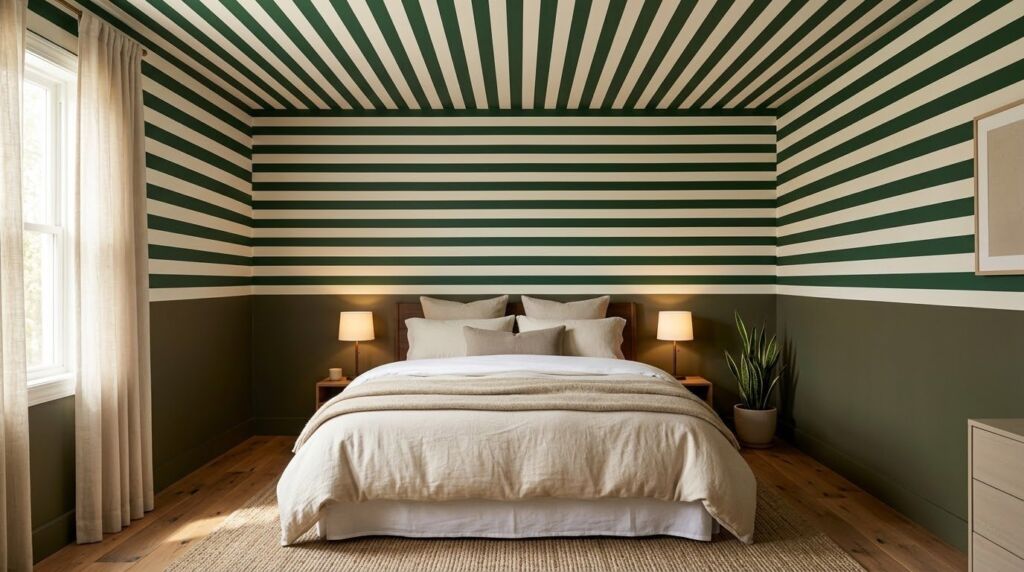
The wall paint half and half look is a game changer. You paint the top half of the wall and the ceiling in stripes. The bottom half stays a solid color. This creates a cozy canopy effect. I used this in my bedroom last year. I chose dark forest green and cream. It felt like being in a tent.
This style hides the line where the wall meets the ceiling. It is perfect for old houses with uneven plaster. You do not have to worry about a perfect corner. The stripes just flow down the wall. It is a very human way to hide architectural flaws. My room went from boring to a designer suite in one weekend.
5. The Mismatched Width Play

Stop making all your stripes the same size. Try one wide stripe followed by two thin ones. This is a more artistic patterned ceiling. It looks custom and high end. I saw this in a boutique hotel in London. They used black and gold. It was stunning.
You can use a T-Square to mark these off. I like the Empire 48 inch T-Square for ceiling work. It gives you a long straight edge. This style of painted stripes on ceiling areas feels less like a circus and more like a gallery. It works well in a dining room. It sparks conversation during dinner.
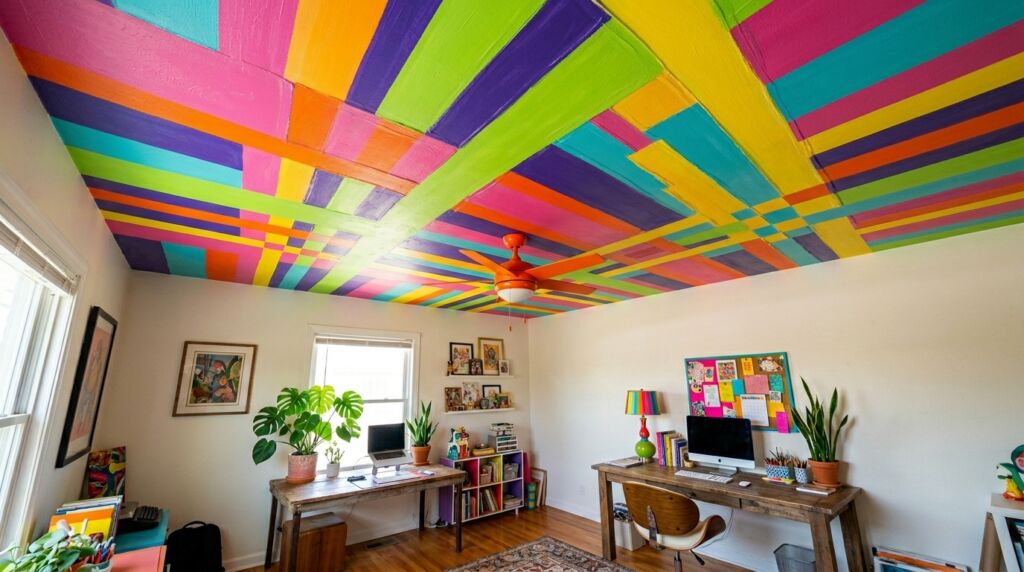
6. The Sunburst Radial Design
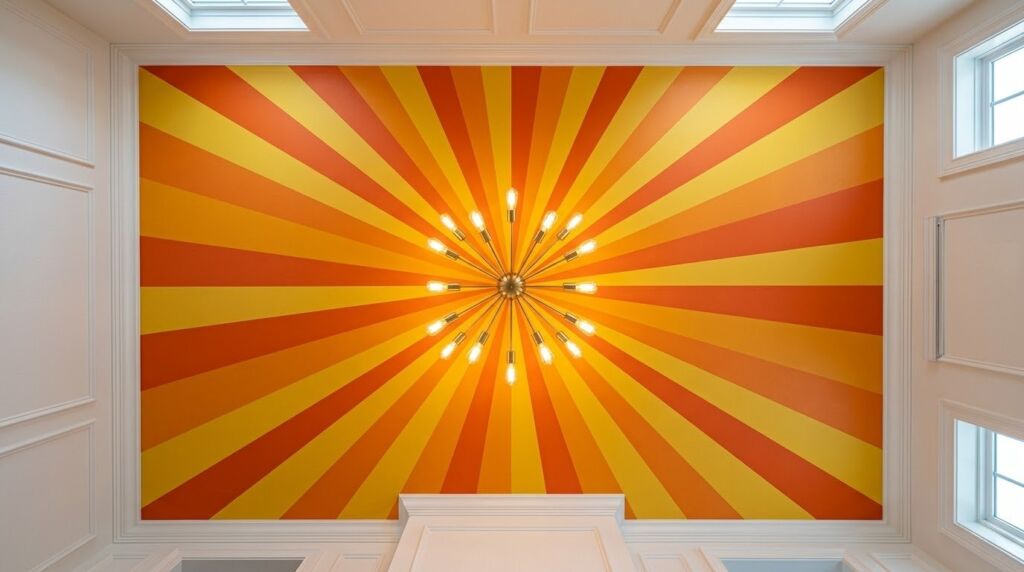
This is the hardest of the striped ceiling ideas to pull off. The stripes start in the center of the room. They fan out like a sun. It requires a lot of math. You need to find the exact center point. I used a string and a thumb tack for my office. It took me four hours just to tape it.
The effort is worth it. It creates a focal point around your light fixture. A colorful ceiling with a sunburst makes the light look like it is exploding. Use a bright yellow for a true sun effect. It makes the yellow ceiling hallway concept look simple by comparison. Use delicate surface FrogTape for the center point. It prevents the paint from peeling when you overlap the tape.
15 Striped Ceiling Ideas Comparison Table
| Style | Difficulty | Best Room | Estimated Cost |
| Classic Circus | Medium | Kids Room | $80 |
| Tone on Tone | Easy | Bedroom | $100 |
| Hallway Runner | Easy | Hallway | $50 |
| Half and Half | Medium | Dining Room | $120 |
| Mismatched | Medium | Living Room | $90 |
| Sunburst | Hard | Entryway | $150 |
| Geometric | Hard | Office | $130 |
| Diagonal | Medium | Bathroom | $70 |
| Bordered | Easy | Kitchen | $60 |
| Ombre | Hard | Studio | $110 |
7. The Diagonal Kinetic Stripe
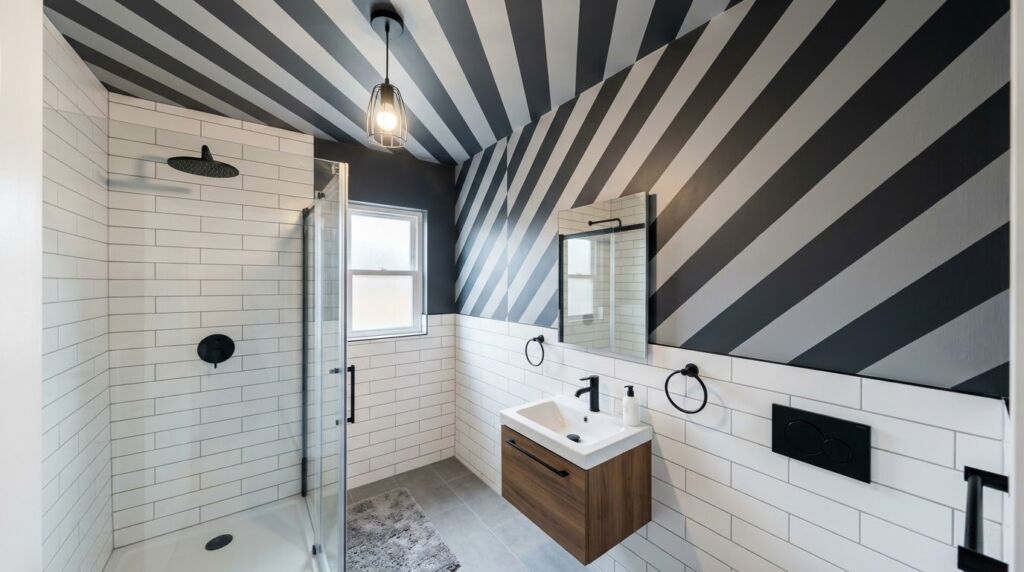
Diagonal stripes create a sense of movement. Most striped ceiling paint projects go parallel to the walls. Going at a 45 degree angle changes the energy. I used this in a small laundry room. The room felt static and cramped. The diagonal stripes made it feel bigger.
You must be careful with the corners. Tape the entire perimeter first. Then lay your diagonal lines. Use a laser level that can lock at an angle. The DeWalt DW088K is a solid choice. It helps you keep the angle consistent across the whole surface. This is a top tier patterned ceiling painted technique for modern homes.
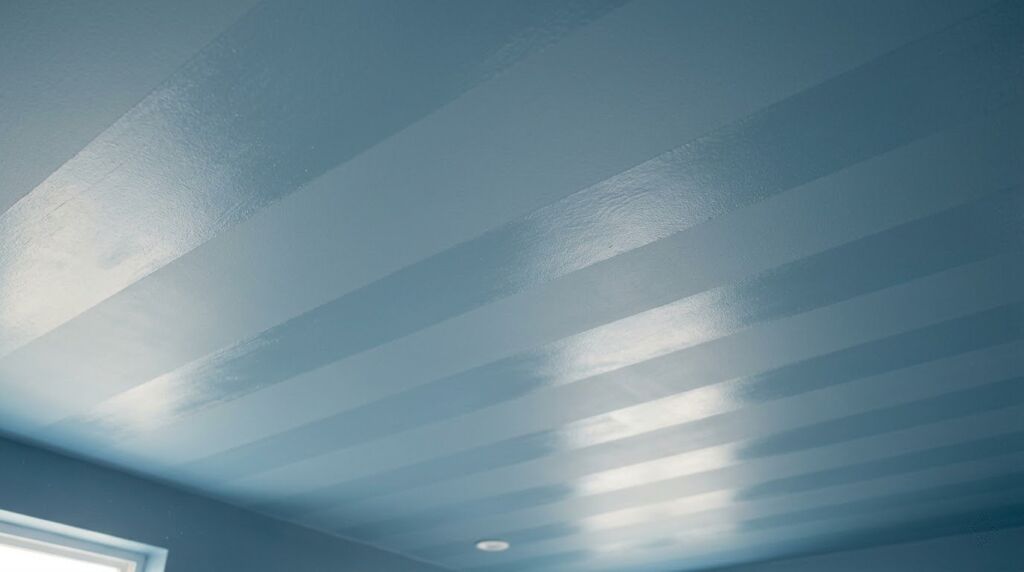
8. The Gloss vs Matte Contrast
This is a secret trick from pro painters. Use the same color for every stripe. But change the finish. Paint the whole ceiling matte. Then tape off stripes and paint them with high gloss. It is a ghost stripe. You only see it from certain angles.
I did this in a moody library with black paint. It looked like expensive wallpaper. It is the most subtle of the striped ceiling ideas. It feels very luxurious. Use a small foam roller for the gloss stripes. It prevents brush marks. This creates a very smooth finish. It is a great way to use a colorful ceiling without it being loud.
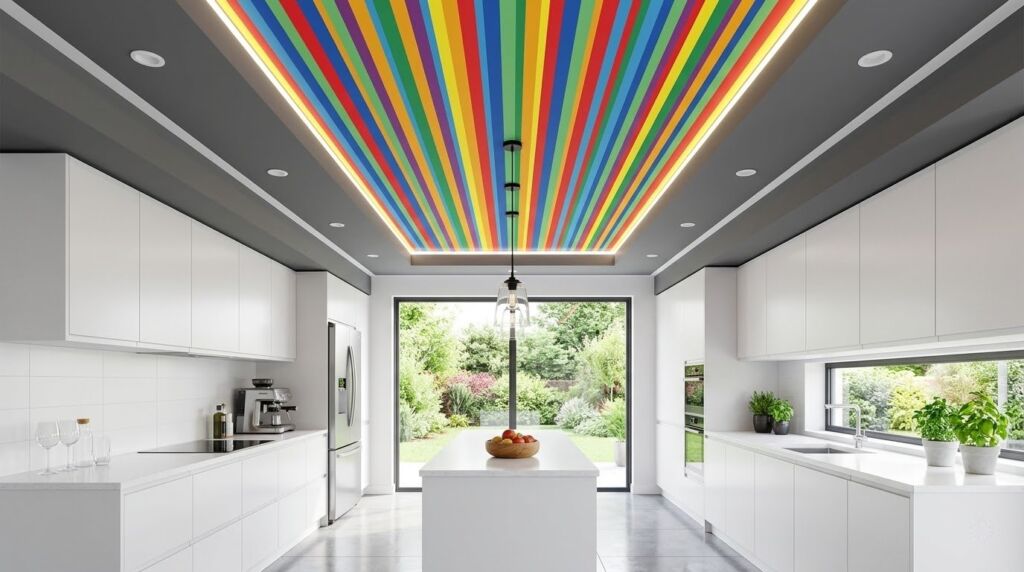
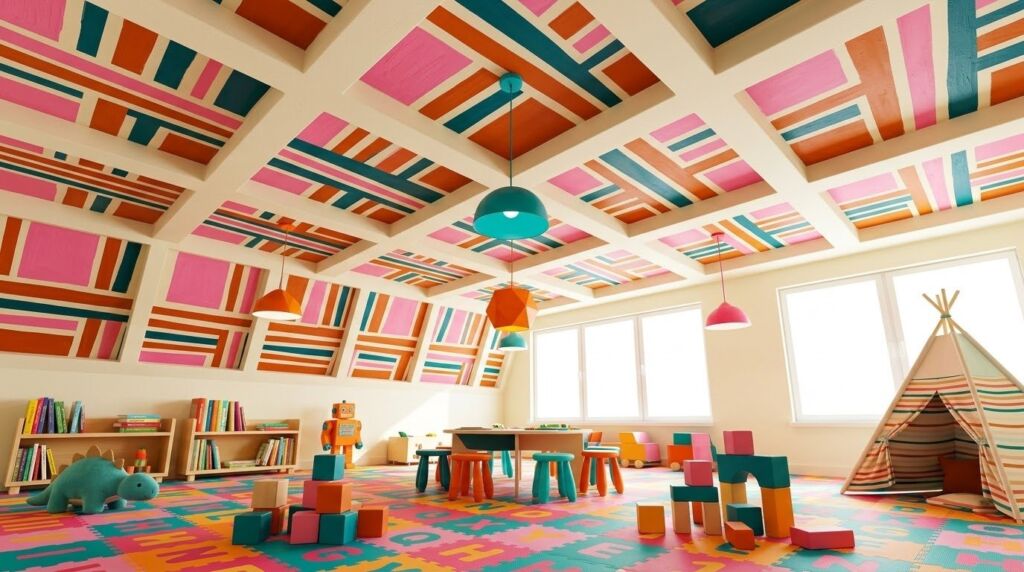
9. The Primary Color Pop
The funhaus aesthetic loves primary colors. Use red, blue, and yellow stripes. This is a bold colorful ceiling. It works best in a playroom or a creative studio. I used this for a client who was an illustrator. We used four different colors.
This requires multiple rounds of taping. You must let each color dry for 24 hours. If you rush it, the tape will pull the fresh paint off. I learned this the hard way in 2018. I tried to do three colors in one day. The whole ceiling peeled like a bad sunburn. Take your time. Use a fan to speed up drying. The result of this patterned ceiling is pure joy.
10. The Bordered Inset Stripe
You do not have to cover the whole ceiling. Paint a solid border around the edge of the room. Then put the stripes in the middle. This acts like a framed piece of art. It is a great way to handle rooms with weird angles. I used this in a kitchen with a lot of cabinets.
The border stays a solid color that matches the walls. The stripes sit in the center. It keeps the room from feeling too busy. Use a soft grey for the border and bright stripes for the center. This is a very clean version of the painted stripes on ceiling trend. It looks professional and intentional.
11. The Ceiling to Floor Continuity
Take one or two stripes and run them down the wall. Stop at the floor. This creates a visual bridge. It is a common feature in the funhaus style. I used a wide yellow stripe in a bedroom. It started on the ceiling and went behind the headboard.
It makes the bed the star of the room. It feels very custom. Use a plumb bob to make sure the wall portion is perfectly vertical. If it leans even an inch, it will look messy. This is a brave move for any colorful ceiling lover. It shows you are not afraid of big design choices.
12. The Architectural Shadow Line
Use a thin dark stripe next to a wider light stripe. This mimics the look of a shadow. It adds a 3D effect to your patterned ceiling painted surface. I saw this in a modern loft in New York. It made the ceiling look like it was floating.
Use a 1 inch tape for the shadow line. Use a 12 inch roller for the main stripe. It is a high contrast look. I recommend black and white or navy and grey. This is one of those striped ceiling ideas that people will stare at for a long time. They will try to figure out how you did it.
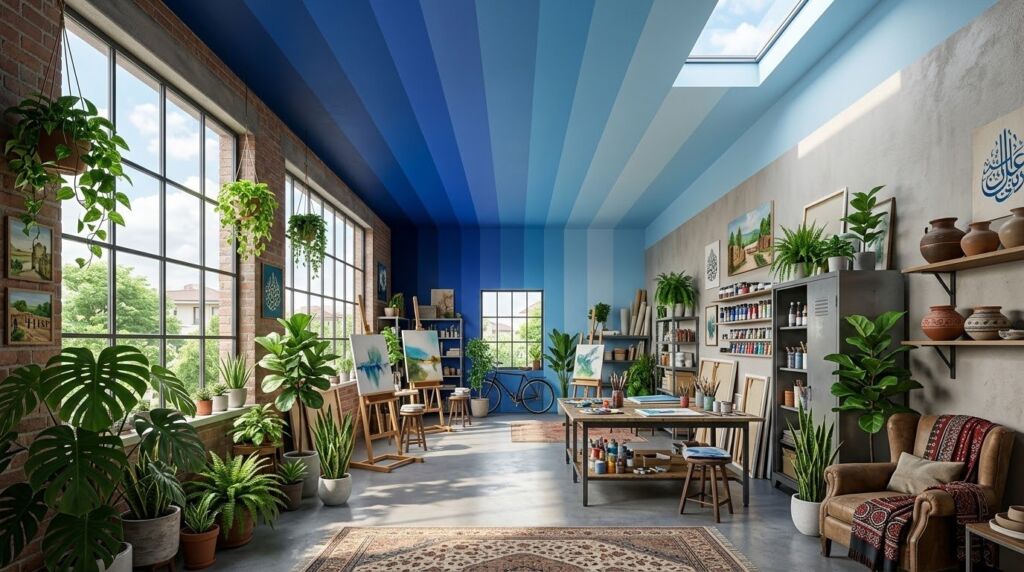
13. The Ombre Gradient Fade

This is for the true artists. Each stripe gets slightly darker as you move across the room. It creates a gradient effect. It is very calming. I used this in a bathroom with shades of seafoam green. It felt like being underwater.
You will need to mix your paints. Start with a base of white. Add a little bit of your main color for each new stripe. It is a slow process. But the result is a beautiful colorful ceiling that feels soft. It is the opposite of the sharp yellow ceiling hallway look. It is peaceful and fluid.
14. The Wide Plank Nautical Stripe
Use very wide stripes, about 18 to 24 inches. This looks like wide floorboards. It gives a coastal or farmhouse feel. I used navy and off white in a sunroom. It felt like being on a yacht. It is a very sturdy look.
Wider stripes are easier to paint. You have less tape to pull. You can use a large 18 inch roller frame. I like the Wooster Sherlock. It covers ground fast. This is a great choice for large open plan living areas. It keeps the patterned ceiling from feeling too small for the room.
15. The Checkerboard Hybrid
Mix stripes with a few squares. It is a very funky funhaus move. I did this in a home office. It kept the space feeling creative. You paint the stripes first. Then you cross them in specific areas to make blocks.
Use bright, clashing colors. Think pink and orange or lime and purple. This is the ultimate colorful ceiling. It is loud. It is proud. It is not for the faint of heart. But it will make you smile every time you walk in. It is the peak of the striped ceiling paint trend.
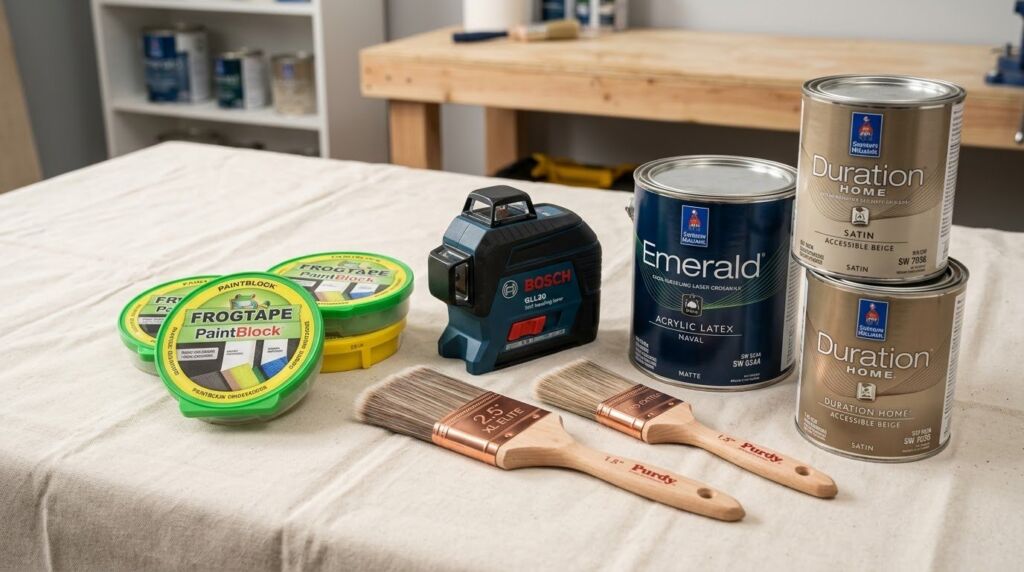
Tools for the Perfect Striped Ceiling
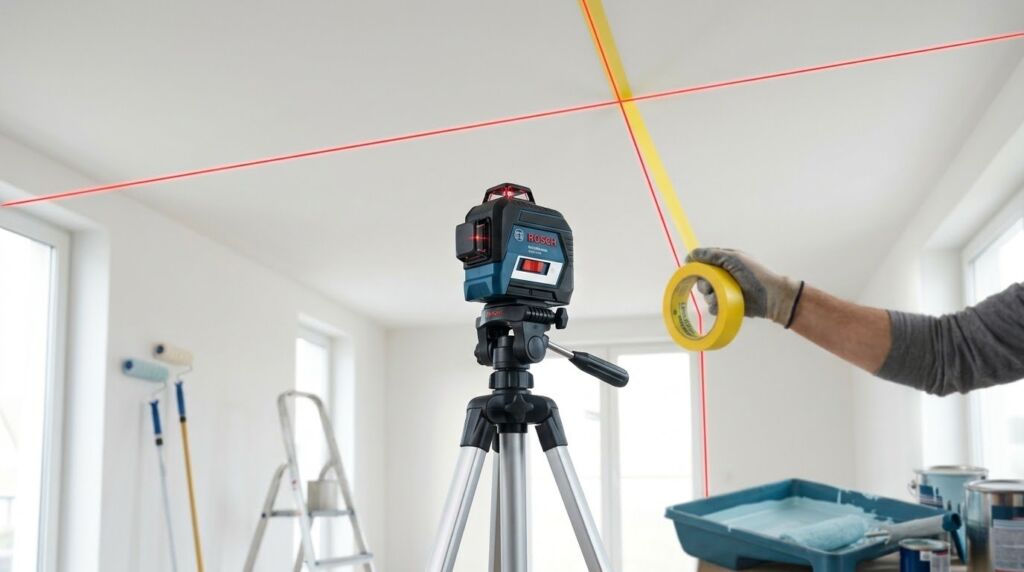
You need the right gear to avoid a mess. Cheap tape will ruin your day. It lets paint bleed underneath. Then you have to spend hours touching it up. I always use FrogTape Yellow for delicate surfaces. It has a powder that turns into a gel when paint hits it. This seals the edge perfectly.
A laser level is a must. You cannot draw straight lines over your head with a ruler. I like the Bosch GLL 30. It is affordable and very accurate. You also need a high quality ceiling paint. Sherwin Williams Emerald is my favorite. It goes on thick and does not drip much. Get a good sturdy ladder too. You will be on it for hours. I use a Little Giant for the stability.
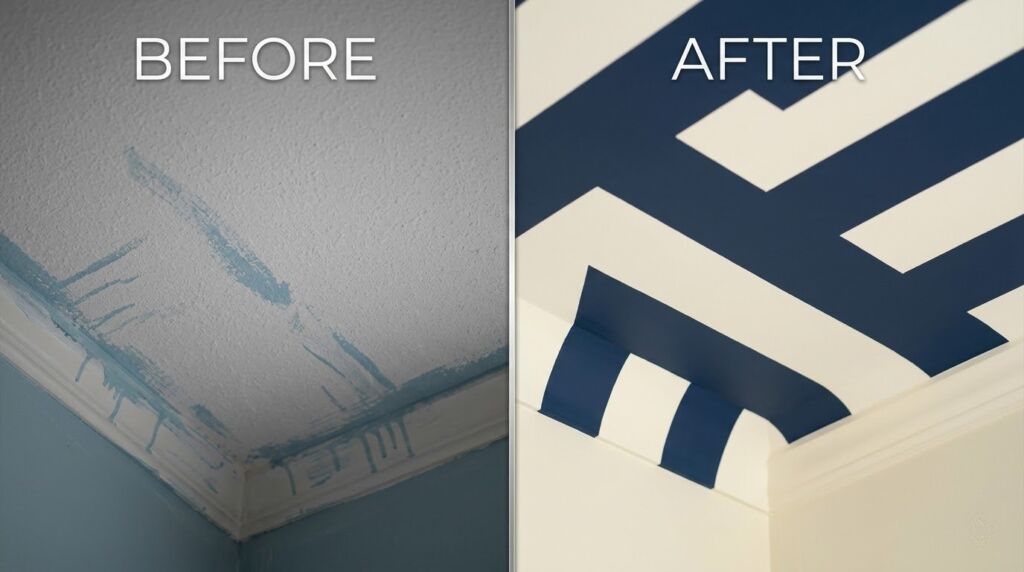
My Biggest Failure: A Case Study
I once tried to paint a striped ceiling in a kitchen with textured plaster. It was a disaster. I used standard blue tape. The paint bled into every little bump and groove. When I pulled the tape, the lines looked like zig zags. I spent three days with a tiny artist brush trying to fix it.
The lesson was clear. Do not use stripes on heavy texture. If you have a popcorn ceiling, scrape it off first. Or use the “caulk trick.” You lay the tape, then run a tiny bead of clear caulk along the edge. Wipe it flat. This seals the texture gaps. Then you paint. I used this on my next project and the lines were sharp as a razor. It saved my sanity.
Cost and Time Breakdown
Painting a ceiling with stripes takes more time than a solid color. You have to wait for the base coat to dry. Then you tape. Then you paint the stripes. Then you pull the tape while the paint is still slightly damp.
- Materials: $100 – $150 (Paint, Tape, Brushes)
- Tools: $50 – $200 (Ladder, Laser Level)
- Time: 12 – 16 hours over two days.
- Difficulty: 7 out of 10.
It is a cheap way to get a high end look. If you hired a pro, it would cost $1000 or more. Doing it yourself is a huge win for your budget.
Frequently Asked Questions
Does a striped ceiling make a room look smaller?
No. It usually makes the room feel taller. Vertical elements draw the eye up. If you use very dark colors, it might feel more enclosed. But with bright funhaus colors, it feels open.
What is the best width for stripes?
I recommend 10 inches for most rooms. It is a classic size. If the room is huge, go up to 18 inches. In a tiny bathroom, 6 inches works well.
Can I do this alone?
Yes. But a friend helps. Someone needs to hold the ladder or move the laser level. It goes twice as fast with two people.
How do I prevent paint bleed?
Use high quality tape. Press the edges down hard with a credit card. Paint the base color over the tape edge first. This seals it. Then paint your stripe color.
What if I hate it?
It is just paint. You can paint over it in an hour. That is the beauty of DIY. There is no risk that a bucket of paint cannot fix.
Your Next Step
Now you have 15 striped ceiling ideas to choose from. Pick a small room first. Maybe a bathroom or a hallway. Get your tape and your laser level. Try the yellow ceiling hallway look for an instant mood lift. Do not be afraid of the colorful ceiling trend. It is the best way to make your home feel like you. Start your project this weekend. You will be amazed at what a few stripes can do for your space.